
Archive of the Gamebuino Classic forum (2014-2018), rebuilt from the pages kept by the Wayback Machine: only part of the topics and pages were captured. Read-only. Removal on request: hi@gamebuino.com.
Newb at game making Sprite and game map developing
Sorunome Fri Jul 29, 2016 12:58 pm
I'm sorry, I'm not more helping you with these questions. They all have well-documented answers and multiple examples to them. You also still have very basic issues with C++ as in not knowing where to put code.
Please take a look at tutorials, there are specific gamebuino-ones in the wiki and you could also use just about any arduino tutorial to help you with those first few steps, but I do not support trying to make something quite complex if the simple concepts of functions and variable scopes and thelike aren't understood yet.
However, when you gained some more experience, feel free to ask any more questions ^.^
Please take a look at tutorials, there are specific gamebuino-ones in the wiki and you could also use just about any arduino tutorial to help you with those first few steps, but I do not support trying to make something quite complex if the simple concepts of functions and variable scopes and thelike aren't understood yet.
However, when you gained some more experience, feel free to ask any more questions ^.^
naed Fri Jul 29, 2016 6:40 pm
I'm still learning but will load up your code and see what it looks like for me
Just give me a few hours so I can get to a computer ;)
EDIT:
Wow your code is messed up, no wonder your getting lots of errors - and its simple things too that your missing (and like i said i'm a Noob when it comes to this but even i can see these errors)
firstly your gb error - you must ALWAYS have this at the start of your code
secondly you don't have enough "}" tokens to close your code
thirdly you do not declare anything at all for this bit of code
after trying my hardest to work out what you were trying to code and correcting what i could (I commented out the shoot part above) i got this to compile and display
but it does nothing more than display random pixels on the screen
What you need to do is break this down into chunks, your first task should be getting your room to display correctly as i'm not even certain you have managed this yet - upload your room sprites if you want me to help you with this
Just give me a few hours so I can get to a computer ;)
EDIT:
Wow your code is messed up, no wonder your getting lots of errors - and its simple things too that your missing (and like i said i'm a Noob when it comes to this but even i can see these errors)
firstly your gb error - you must ALWAYS have this at the start of your code
- Code: Select all
//creates a Gamebuino object named gb
Gamebuino gb;
secondly you don't have enough "}" tokens to close your code
thirdly you do not declare anything at all for this bit of code
- Code: Select all
if(gb.buttons.repeat(BTN_A,1)){
        if(shootdelay<=0){
            shootdelay=15-(player.rate*10/50);
            initShoot();
          }
after trying my hardest to work out what you were trying to code and correcting what i could (I commented out the shoot part above) i got this to compile and display
- Code: Select all
//imports the SPI library (needed to communicate with Gamebuino's screen)
#include <SPI.h>
//imports the Gamebuino library
#include <Gamebuino.h>
//creates a Gamebuino object named gb
Gamebuino gb;

                                                       /// room 1 in hexadecimal
const byte room_1[] = {88,48,
0xa6,0x9a,0x69,0xa6,0x9f,0xff,0xa6,0x9a,0x69,0xa6,0x90
,0x59,0x65,0x96,0x59,0x6f,0xff,0x59,0x65,0x96,0x59,0x60
,0xeb,0xae,0xba,0xeb,0xaf,0xff,0xeb,0xae,0xba,0xeb,0xa0
,0x5d,0x75,0xd7,0x5d,0x7f,0xff,0x5d,0x75,0xd7,0x5d,0x70
,0x79,0xe7,0x9e,0x79,0xef,0xff,0x79,0xe7,0x9e,0x79,0xe0
,0xa6,0x9a,0x69,0xa6,0x9f,0xff,0xa6,0x9a,0x69,0xa6,0x90
,0xa6,0x9a,0x7f,0xa7,0xff,0xff,0xff,0xff,0xff,0xa6,0x90
,0x59,0x65,0xbf,0x5b,0xff,0xff,0xff,0xff,0xff,0x59,0x60
,0xeb,0xae,0xbf,0xeb,0xff,0xff,0xff,0xff,0xff,0xeb,0xa0
,0x5d,0x75,0xff,0x5f,0xff,0xff,0xff,0xff,0xff,0x5d,0x70
,0x79,0xe7,0xbf,0x7b,0xff,0xff,0xff,0xff,0xff,0x79,0xe0
,0xa6,0x9a,0x7f,0xa7,0xff,0xff,0xff,0xff,0xff,0xa6,0x90
,0xa6,0x9f,0xff,0xff,0xff,0xff,0xff,0xff,0xff,0xa6,0x90
,0x59,0x6f,0xff,0xff,0xff,0xff,0xff,0xff,0xff,0x59,0x60
,0xeb,0xaf,0xff,0xff,0xff,0xff,0xff,0xff,0xff,0xeb,0xa0
,0x5d,0x7f,0xff,0xff,0xff,0xff,0xff,0xff,0xff,0x5d,0x70
,0x79,0xef,0xff,0xff,0xff,0xff,0xff,0xff,0xff,0x79,0xe0
,0xa6,0x9f,0xff,0xff,0xff,0xff,0xff,0xff,0xff,0xa6,0x90
,0xa7,0xff,0xff,0xff,0xff,0xff,0xff,0xff,0xff,0xa6,0x90
,0x5b,0xff,0xff,0xff,0xff,0xff,0xff,0xff,0xff,0x59,0x60
,0xeb,0xff,0xff,0xff,0xff,0xff,0xff,0xff,0xff,0xeb,0xa0
,0x5f,0xff,0xff,0xff,0xff,0xff,0xff,0xff,0xff,0x5d,0x70
,0x7b,0xff,0xff,0xff,0xff,0xff,0xff,0xff,0xff,0x79,0xe0
,0xa7,0xff,0xff,0xff,0xff,0xff,0xff,0xff,0xff,0xa6,0x90
,0xff,0xff,0xff,0xff,0xff,0xff,0xff,0xff,0xff,0xff,0xf0
,0xff,0xff,0xff,0xff,0xff,0xff,0xff,0xff,0xff,0xff,0xf0
,0xff,0xff,0xff,0xff,0xff,0xff,0xff,0xff,0xff,0xff,0xf0
,0xff,0xff,0xff,0xff,0xff,0xff,0xff,0xff,0xff,0xff,0xf0
,0xff,0xff,0xff,0xff,0xff,0xff,0xff,0xff,0xff,0xff,0xf0
,0xff,0xff,0xff,0xff,0xff,0xff,0xff,0xff,0xff,0xff,0xf0
,0xa6,0x9f,0xff,0xff,0xff,0xff,0xff,0xff,0xff,0xa6,0x90
,0x59,0x6f,0xff,0xff,0xff,0xff,0xff,0xff,0xff,0x59,0x60
,0xeb,0xaf,0xff,0xff,0xff,0xff,0xff,0xff,0xff,0xeb,0xa0
,0x5d,0x7f,0xff,0xff,0xff,0xff,0xff,0xff,0xff,0x5d,0x70
,0x79,0xef,0xff,0xff,0xff,0xff,0xff,0xff,0xff,0x79,0xe0
,0xa6,0x9f,0xff,0xff,0xff,0xff,0xff,0xff,0xff,0xa6,0x90
,0xa6,0x9f,0xff,0xff,0xff,0xff,0xff,0xff,0xff,0xa6,0x90
,0x59,0x6f,0xff,0xff,0xff,0xff,0xff,0xff,0xff,0x59,0x60
,0xeb,0xaf,0xff,0xff,0xff,0xff,0xff,0xff,0xff,0xeb,0xa0
,0x5d,0x7f,0xff,0xff,0xff,0xff,0xff,0xff,0xff,0x5d,0x70
,0x79,0xef,0xff,0xff,0xff,0xff,0xff,0xff,0xff,0x79,0xe0
,0xa6,0x9f,0xff,0xff,0xff,0xff,0xff,0xff,0xff,0xa6,0x90
,0xa6,0x9a,0x69,0xa6,0x9a,0x69,0xa6,0x9a,0x69,0xa6,0x90
,0x59,0x65,0x96,0x59,0x65,0x96,0x59,0x65,0x96,0x59,0x60
,0xeb,0xae,0xba,0xeb,0xae,0xba,0xeb,0xae,0xba,0xeb,0xa0
,0x5d,0x75,0xd7,0x5d,0x75,0xd7,0x5d,0x75,0xd7,0x5d,0x70
,0x79,0xe7,0x9e,0x79,0xe7,0x9e,0x79,0xe7,0x9e,0x79,0xe0
,0xa6,0x9a,0x69,0xa6,0x9a,0x69,0xa6,0x9a,0x69,0xa6,0x90,};


//sever sprites

const byte sever_rear[] PROGMEM = {6,6,1,1,1,1,1,1,0,1,1,1,1,0,0,1,1,1,1,0,1,0,1,1,0,1,0,1,1,1,1,0,1,1,0,0,1,1,};
const byte sever_right[] PROGMEM = {6,6,1,1,1,1,1,0,0,1,1,1,0,1,0,1,0,0,1,0,1,0,1,1,0,1,0,1,1,1,1,1,1,1,0,0,1,1,};
const byte sever_front[] PROGMEM = {6,6,1,1,1,1,1,1,0,1,0,0,1,0,0,1,1,1,1,0,1,0,1,1,0,1,0,1,1,1,1,0,1,1,0,0,1,1,};
const byte sever_left[] PROGMEM = {6,6,0,1,1,1,1,1,1,0,1,1,1,0,1,1,0,0,1,0,1,0,1,1,0,1,0,1,1,1,1,0,1,1,0,0,1,1,};

#define NUM_SPRITES 4
const byte* Sprites_player[NUM_SPRITES] = {sever_rear, sever_right, sever_front, sever_left,};

///////player variables

typedef struct {
  int x;
  int y;
  int vx;
  int vy;
  int orientation;
}Config;
Config player;

const byte bullet[] PROGMEM = {2,2,1,1,1,1,};

float shootdelay;

typedef struct{
  boolean on;
  int x;
  int y;
  int vx;
  int vy;
  int orientation;
}
confshoot;


/////////GAME

void setup() {
  // put your setup code here, to run once:
  gb.begin();
  gb.titleScreen(F("Myth of Esmerelda"));
};

void initPlayer(){
  player.x=0;
  player.y=0;
  player.vx=0;
  player.vy=0;
  player.orientation=3;
};


void loop(){
  // put your main code here, to run repeatedly:
  if(gb.update()){
    gb.display.setColor(BLACK);
    gb.display.drawBitmap(0,0,room_1);


      if(gb.buttons.repeat(BTN_RIGHT,1)){
        player.x = player.x + player.vx;
        if(gb.buttons.repeat(BTN_A,1)){
        }else{
          player.orientation=1;
        }
      }

      if(gb.buttons.repeat(BTN_LEFT,1)){
        player.x = player.x - player.vx;
        if(gb.buttons.repeat(BTN_A,1)){
        }else{
          player.orientation=3;
        }
      }

      if(gb.buttons.repeat(BTN_DOWN,1)){
        player.y = player.y + player.vy;
        if(gb.buttons.repeat(BTN_A,1)){
        }else{
          player.orientation=2;
        }
      }

      if(gb.buttons.repeat(BTN_UP,1)){
        player.y = player.y - player.vy;
        if(gb.buttons.repeat(BTN_A,1)){
        }else{
          player.orientation=0;
        }
      }

//      if(gb.buttons.repeat(BTN_A,1)){
//        if(shootdelay<=0){
//            shootdelay=15-(player.rate*10/50);
//            initShoot();
//          }
      }
  }
but it does nothing more than display random pixels on the screen
What you need to do is break this down into chunks, your first task should be getting your room to display correctly as i'm not even certain you have managed this yet - upload your room sprites if you want me to help you with this
Duhjoker Fri Jul 29, 2016 9:21 pm
Sorunome please don't be offended and I'm not trying to be rude but what tutorials are you talking about exactly? There are 4 video tutorials that I can find 2 in English and two more I can't understand because they are in French. I've asked several times about examples in the arduino library or in other games but you keep telling me to look at tutorials. I don't know which "examples" to look at. The getting started guides do not help either.
Every thing I've tried but what you gave me I took from what I could understand out of what info I was given.
The brackets are something I'm still trying to learn. The placement confuses me about where and which ones to use at the beginning and end of the code blocks.
Naed ok thank you here's what I was trying to do. Could have swore I added the Gamebuino gb. Now I see I didn't.
The shoot key command was something I found thought I would try it since my link character will shoot projectiles when at full health.
I thought I had the drawBitMap command under control but let me try again to just display my room Sprite.
Thank you both for your help I'm trying to understand I really am.
also I took the player movement code from descent into heel a Gamebuino game with almost the same set up as the Zelda game but with random dungeon rooms and random monster encounters. It's the only example I can find that has what I'm trying to do. Please take a look at the source code as I think parts of it can be used in my game.
https://github.com/etienne72230/Descent ... toHell.ino
Every thing I've tried but what you gave me I took from what I could understand out of what info I was given.
The brackets are something I'm still trying to learn. The placement confuses me about where and which ones to use at the beginning and end of the code blocks.
Naed ok thank you here's what I was trying to do. Could have swore I added the Gamebuino gb. Now I see I didn't.
The shoot key command was something I found thought I would try it since my link character will shoot projectiles when at full health.
I thought I had the drawBitMap command under control but let me try again to just display my room Sprite.
Thank you both for your help I'm trying to understand I really am.
also I took the player movement code from descent into heel a Gamebuino game with almost the same set up as the Zelda game but with random dungeon rooms and random monster encounters. It's the only example I can find that has what I'm trying to do. Please take a look at the source code as I think parts of it can be used in my game.
https://github.com/etienne72230/Descent ... toHell.ino
naed Fri Jul 29, 2016 9:54 pm
haha! its ok we all have to start somewhere i guess... I struggled to start off with, there are very little gamebuino specific tutorials available, but by simply reading the forums you will find a wealth of information and also by looking at other peoples projects/game code you will grasp at least the basics rather quick, I only started coding about 2 months ago and my latest project i'm really proud of (see it here)
I find it easier to build my projects in parts, then put the parts together to get a full project
the main issue you have is your adding code that is irrelevant right now, adding movement code without even displaying a character sprite seems pretty pointless to me (because you can't even see if it is working), if i was creating a similar project to yours i'd break my workload down into several parts
1 - display room/map
2 - display character
3 - enable movement for character
4 - set character collision boundaries
5 - etc...
I find it easier to build my projects in parts, then put the parts together to get a full project
the main issue you have is your adding code that is irrelevant right now, adding movement code without even displaying a character sprite seems pretty pointless to me (because you can't even see if it is working), if i was creating a similar project to yours i'd break my workload down into several parts
1 - display room/map
2 - display character
3 - enable movement for character
4 - set character collision boundaries
5 - etc...
Duhjoker Fri Jul 29, 2016 10:15 pm
Awesome we can do it that way.
Im really starting to get a lil confused and frustrated, I used this example I snatched from the first video tutorial.
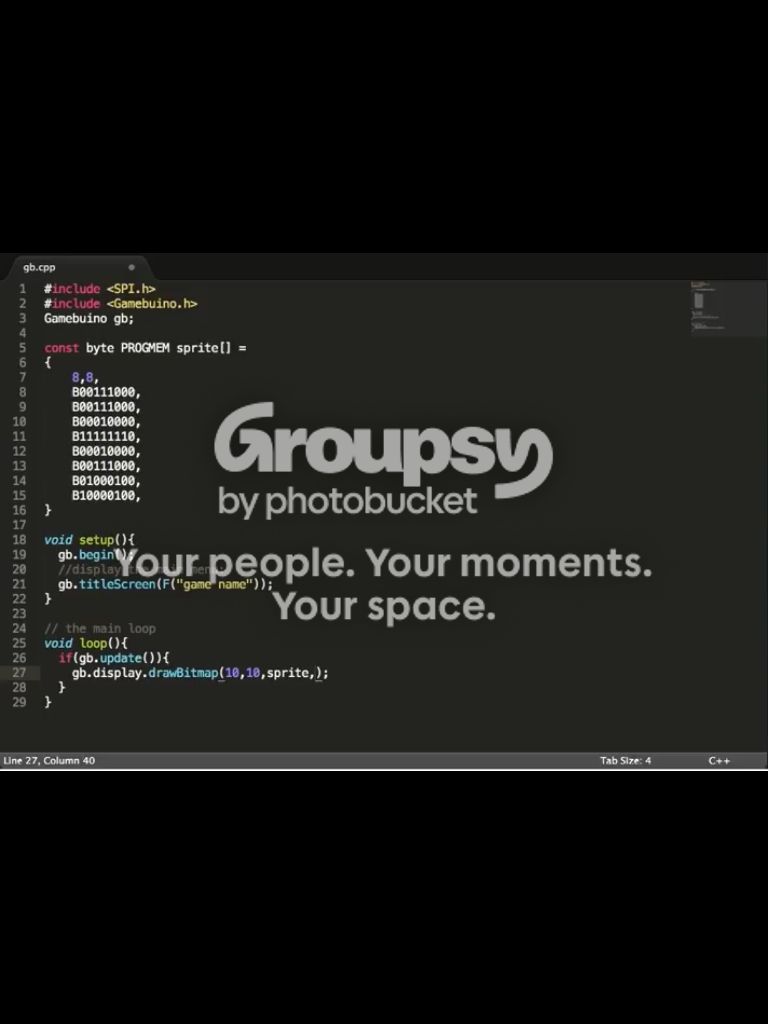
Hold on going to have to update
ok im back.
the only thing I changed was the sprite the name and the location but I get expected primary expression before ) token on the drawbitmap line.
I also took the same code and tried to verify that and same problem. I tried this exact example when I first started trying to learn and had no problem with it.
Im unaware where to put the setcolor commands for the background and sprite. im sure theres a better way but the examples I have are for three colours, white grey and black.
Also confused about where exactly progmem should be placed, before or after ' sprite[]'
I don't expect or want any body to write or do the work for me all I ask is for corrections or suggestions for a better way to write it or correct it.
again thank you for helping me
Im really starting to get a lil confused and frustrated, I used this example I snatched from the first video tutorial.
Hold on going to have to update
ok im back.
the only thing I changed was the sprite the name and the location but I get expected primary expression before ) token on the drawbitmap line.
I also took the same code and tried to verify that and same problem. I tried this exact example when I first started trying to learn and had no problem with it.
- Code: Select all
#include <SPI.h>
#include <Gamebuino.h>
Gamebuino gb;


const byte PROGMEM room_1[] = {88,48,
0xa6,0x9a,0x69,0xa6,0x9f,0xff,0xa6,0x9a,0x69,0xa6,0x90
,0x59,0x65,0x96,0x59,0x6f,0xff,0x59,0x65,0x96,0x59,0x60
,0xeb,0xae,0xba,0xeb,0xaf,0xff,0xeb,0xae,0xba,0xeb,0xa0
,0x5d,0x75,0xd7,0x5d,0x7f,0xff,0x5d,0x75,0xd7,0x5d,0x70
,0x79,0xe7,0x9e,0x79,0xef,0xff,0x79,0xe7,0x9e,0x79,0xe0
,0xa6,0x9a,0x69,0xa6,0x9f,0xff,0xa6,0x9a,0x69,0xa6,0x90
,0xa6,0x9a,0x7f,0xa7,0xff,0xff,0xff,0xff,0xff,0xa6,0x90
,0x59,0x65,0xbf,0x5b,0xff,0xff,0xff,0xff,0xff,0x59,0x60
,0xeb,0xae,0xbf,0xeb,0xff,0xff,0xff,0xff,0xff,0xeb,0xa0
,0x5d,0x75,0xff,0x5f,0xff,0xff,0xff,0xff,0xff,0x5d,0x70
,0x79,0xe7,0xbf,0x7b,0xff,0xff,0xff,0xff,0xff,0x79,0xe0
,0xa6,0x9a,0x7f,0xa7,0xff,0xff,0xff,0xff,0xff,0xa6,0x90
,0xa6,0x9f,0xff,0xff,0xff,0xff,0xff,0xff,0xff,0xa6,0x90
,0x59,0x6f,0xff,0xff,0xff,0xff,0xff,0xff,0xff,0x59,0x60
,0xeb,0xaf,0xff,0xff,0xff,0xff,0xff,0xff,0xff,0xeb,0xa0
,0x5d,0x7f,0xff,0xff,0xff,0xff,0xff,0xff,0xff,0x5d,0x70
,0x79,0xef,0xff,0xff,0xff,0xff,0xff,0xff,0xff,0x79,0xe0
,0xa6,0x9f,0xff,0xff,0xff,0xff,0xff,0xff,0xff,0xa6,0x90
,0xa7,0xff,0xff,0xff,0xff,0xff,0xff,0xff,0xff,0xa6,0x90
,0x5b,0xff,0xff,0xff,0xff,0xff,0xff,0xff,0xff,0x59,0x60
,0xeb,0xff,0xff,0xff,0xff,0xff,0xff,0xff,0xff,0xeb,0xa0
,0x5f,0xff,0xff,0xff,0xff,0xff,0xff,0xff,0xff,0x5d,0x70
,0x7b,0xff,0xff,0xff,0xff,0xff,0xff,0xff,0xff,0x79,0xe0
,0xa7,0xff,0xff,0xff,0xff,0xff,0xff,0xff,0xff,0xa6,0x90
,0xff,0xff,0xff,0xff,0xff,0xff,0xff,0xff,0xff,0xff,0xf0
,0xff,0xff,0xff,0xff,0xff,0xff,0xff,0xff,0xff,0xff,0xf0
,0xff,0xff,0xff,0xff,0xff,0xff,0xff,0xff,0xff,0xff,0xf0
,0xff,0xff,0xff,0xff,0xff,0xff,0xff,0xff,0xff,0xff,0xf0
,0xff,0xff,0xff,0xff,0xff,0xff,0xff,0xff,0xff,0xff,0xf0
,0xff,0xff,0xff,0xff,0xff,0xff,0xff,0xff,0xff,0xff,0xf0
,0xa6,0x9f,0xff,0xff,0xff,0xff,0xff,0xff,0xff,0xa6,0x90
,0x59,0x6f,0xff,0xff,0xff,0xff,0xff,0xff,0xff,0x59,0x60
,0xeb,0xaf,0xff,0xff,0xff,0xff,0xff,0xff,0xff,0xeb,0xa0
,0x5d,0x7f,0xff,0xff,0xff,0xff,0xff,0xff,0xff,0x5d,0x70
,0x79,0xef,0xff,0xff,0xff,0xff,0xff,0xff,0xff,0x79,0xe0
,0xa6,0x9f,0xff,0xff,0xff,0xff,0xff,0xff,0xff,0xa6,0x90
,0xa6,0x9f,0xff,0xff,0xff,0xff,0xff,0xff,0xff,0xa6,0x90
,0x59,0x6f,0xff,0xff,0xff,0xff,0xff,0xff,0xff,0x59,0x60
,0xeb,0xaf,0xff,0xff,0xff,0xff,0xff,0xff,0xff,0xeb,0xa0
,0x5d,0x7f,0xff,0xff,0xff,0xff,0xff,0xff,0xff,0x5d,0x70
,0x79,0xef,0xff,0xff,0xff,0xff,0xff,0xff,0xff,0x79,0xe0
,0xa6,0x9f,0xff,0xff,0xff,0xff,0xff,0xff,0xff,0xa6,0x90
,0xa6,0x9a,0x69,0xa6,0x9a,0x69,0xa6,0x9a,0x69,0xa6,0x90
,0x59,0x65,0x96,0x59,0x65,0x96,0x59,0x65,0x96,0x59,0x60
,0xeb,0xae,0xba,0xeb,0xae,0xba,0xeb,0xae,0xba,0xeb,0xa0
,0x5d,0x75,0xd7,0x5d,0x75,0xd7,0x5d,0x75,0xd7,0x5d,0x70
,0x79,0xe7,0x9e,0x79,0xe7,0x9e,0x79,0xe7,0x9e,0x79,0xe0
,0xa6,0x9a,0x69,0xa6,0x9a,0x69,0xa6,0x9a,0x69,0xa6,0x90,};


void setup() {
  // put your setup code here, to run once:
   gb.begin();
   gb.titleScreen(F("Myth of esmerelda"));
}

void loop() {
  // put your main code here, to run repeatedly:
   if(gb.update()){
    gb.display.drawBitmap(0,0,room_1,);
   }
}
Im unaware where to put the setcolor commands for the background and sprite. im sure theres a better way but the examples I have are for three colours, white grey and black.
Also confused about where exactly progmem should be placed, before or after ' sprite[]'
I don't expect or want any body to write or do the work for me all I ask is for corrections or suggestions for a better way to write it or correct it.
again thank you for helping me
naed Fri Jul 29, 2016 10:41 pm
you have one too many commas in line 68 (it's expecting another variable and not finding it)
after removing i can load and see your map/room perfectly
EDIT
also I've always placed it after, but have tried both and it doesn't seem to matter too much
both
const byte sprite[] PROGMEM =
and
const byte PROGMEM sprite[] =
seem to work with no issues
after removing i can load and see your map/room perfectly
EDIT
also I've always placed it after, but have tried both and it doesn't seem to matter too much
both
const byte sprite[] PROGMEM =
and
const byte PROGMEM sprite[] =
seem to work with no issues
Duhjoker Fri Jul 29, 2016 11:34 pm
Awesome!!!!! Thank you. Thought it might be something rookie but I was going a lil mind blind if you get the sci-fi reference.
Ok so now that I can build a room let's try placing my sever player sprite in the room. Would you mind linking me to the right info please!!!
Has any one ever heard of played 3D Tetris? Instead of stacking the blocks vertically your looking into a square and you can rotate the pieces on the X the Y and the Z to fill the square and make lines disappear. It's kind of obscure I haven't been able to find to download but it would be an interesting game for the line up.
Ok so now that I can build a room let's try placing my sever player sprite in the room. Would you mind linking me to the right info please!!!
Has any one ever heard of played 3D Tetris? Instead of stacking the blocks vertically your looking into a square and you can rotate the pieces on the X the Y and the Z to fill the square and make lines disappear. It's kind of obscure I haven't been able to find to download but it would be an interesting game for the line up.
naed Fri Jul 29, 2016 11:56 pm
I will presume you want your character sprite to be white (due to the black background)
to draw your Sever player sprite you do it exactly the same way you drew your background to screen, just change the x&y co-ords so he is in the center
to make him display as white add this
to draw your Sever player sprite you do it exactly the same way you drew your background to screen, just change the x&y co-ords so he is in the center
to make him display as white add this
- Code: Select all
gb.display.setColor(WHITE);
Duhjoker Sat Jul 30, 2016 2:40 am
Ok I'm back had to do some yard work and dinner.
Actually I would like any drawn pixel to be black. So i think I need to set the background to white and the sprites to black.
Actually I would like any drawn pixel to be black. So i think I need to set the background to white and the sprites to black.
Duhjoker Sat Jul 30, 2016 4:24 am
Ok so I did what you said about adding the sever sprite but im having trouble getting the colors right for it too display both the sever sprite and the room sprite as black with a white background. I can get it all white or black and white with the room sprite pixels as white with a black background, but I cant the room sprite to be black pixels and a white background. So its not displaying the sever sprite which I placed at 1,1,.
Here is my code I know I have the colours mixed up in the gb.display.setColor() because I was playing with them. also think I might need to be schooled in what background foreground actually mean so maybe ill understand better.
Also don't know if the third gb.display.setColor() is needed.
Here is my code I know I have the colours mixed up in the gb.display.setColor() because I was playing with them. also think I might need to be schooled in what background foreground actually mean so maybe ill understand better.
- Code: Select all
#include <SPI.h>
#include <Gamebuino.h>
Gamebuino gb;


const byte PROGMEM room_1[] = {88,48,
0xa6,0x9a,0x69,0xa6,0x9f,0xff,0xa6,0x9a,0x69,0xa6,0x90
,0x59,0x65,0x96,0x59,0x6f,0xff,0x59,0x65,0x96,0x59,0x60
,0xeb,0xae,0xba,0xeb,0xaf,0xff,0xeb,0xae,0xba,0xeb,0xa0
,0x5d,0x75,0xd7,0x5d,0x7f,0xff,0x5d,0x75,0xd7,0x5d,0x70
,0x79,0xe7,0x9e,0x79,0xef,0xff,0x79,0xe7,0x9e,0x79,0xe0
,0xa6,0x9a,0x69,0xa6,0x9f,0xff,0xa6,0x9a,0x69,0xa6,0x90
,0xa6,0x9a,0x7f,0xa7,0xff,0xff,0xff,0xff,0xff,0xa6,0x90
,0x59,0x65,0xbf,0x5b,0xff,0xff,0xff,0xff,0xff,0x59,0x60
,0xeb,0xae,0xbf,0xeb,0xff,0xff,0xff,0xff,0xff,0xeb,0xa0
,0x5d,0x75,0xff,0x5f,0xff,0xff,0xff,0xff,0xff,0x5d,0x70
,0x79,0xe7,0xbf,0x7b,0xff,0xff,0xff,0xff,0xff,0x79,0xe0
,0xa6,0x9a,0x7f,0xa7,0xff,0xff,0xff,0xff,0xff,0xa6,0x90
,0xa6,0x9f,0xff,0xff,0xff,0xff,0xff,0xff,0xff,0xa6,0x90
,0x59,0x6f,0xff,0xff,0xff,0xff,0xff,0xff,0xff,0x59,0x60
,0xeb,0xaf,0xff,0xff,0xff,0xff,0xff,0xff,0xff,0xeb,0xa0
,0x5d,0x7f,0xff,0xff,0xff,0xff,0xff,0xff,0xff,0x5d,0x70
,0x79,0xef,0xff,0xff,0xff,0xff,0xff,0xff,0xff,0x79,0xe0
,0xa6,0x9f,0xff,0xff,0xff,0xff,0xff,0xff,0xff,0xa6,0x90
,0xa7,0xff,0xff,0xff,0xff,0xff,0xff,0xff,0xff,0xa6,0x90
,0x5b,0xff,0xff,0xff,0xff,0xff,0xff,0xff,0xff,0x59,0x60
,0xeb,0xff,0xff,0xff,0xff,0xff,0xff,0xff,0xff,0xeb,0xa0
,0x5f,0xff,0xff,0xff,0xff,0xff,0xff,0xff,0xff,0x5d,0x70
,0x7b,0xff,0xff,0xff,0xff,0xff,0xff,0xff,0xff,0x79,0xe0
,0xa7,0xff,0xff,0xff,0xff,0xff,0xff,0xff,0xff,0xa6,0x90
,0xff,0xff,0xff,0xff,0xff,0xff,0xff,0xff,0xff,0xff,0xf0
,0xff,0xff,0xff,0xff,0xff,0xff,0xff,0xff,0xff,0xff,0xf0
,0xff,0xff,0xff,0xff,0xff,0xff,0xff,0xff,0xff,0xff,0xf0
,0xff,0xff,0xff,0xff,0xff,0xff,0xff,0xff,0xff,0xff,0xf0
,0xff,0xff,0xff,0xff,0xff,0xff,0xff,0xff,0xff,0xff,0xf0
,0xff,0xff,0xff,0xff,0xff,0xff,0xff,0xff,0xff,0xff,0xf0
,0xa6,0x9f,0xff,0xff,0xff,0xff,0xff,0xff,0xff,0xa6,0x90
,0x59,0x6f,0xff,0xff,0xff,0xff,0xff,0xff,0xff,0x59,0x60
,0xeb,0xaf,0xff,0xff,0xff,0xff,0xff,0xff,0xff,0xeb,0xa0
,0x5d,0x7f,0xff,0xff,0xff,0xff,0xff,0xff,0xff,0x5d,0x70
,0x79,0xef,0xff,0xff,0xff,0xff,0xff,0xff,0xff,0x79,0xe0
,0xa6,0x9f,0xff,0xff,0xff,0xff,0xff,0xff,0xff,0xa6,0x90
,0xa6,0x9f,0xff,0xff,0xff,0xff,0xff,0xff,0xff,0xa6,0x90
,0x59,0x6f,0xff,0xff,0xff,0xff,0xff,0xff,0xff,0x59,0x60
,0xeb,0xaf,0xff,0xff,0xff,0xff,0xff,0xff,0xff,0xeb,0xa0
,0x5d,0x7f,0xff,0xff,0xff,0xff,0xff,0xff,0xff,0x5d,0x70
,0x79,0xef,0xff,0xff,0xff,0xff,0xff,0xff,0xff,0x79,0xe0
,0xa6,0x9f,0xff,0xff,0xff,0xff,0xff,0xff,0xff,0xa6,0x90
,0xa6,0x9a,0x69,0xa6,0x9a,0x69,0xa6,0x9a,0x69,0xa6,0x90
,0x59,0x65,0x96,0x59,0x65,0x96,0x59,0x65,0x96,0x59,0x60
,0xeb,0xae,0xba,0xeb,0xae,0xba,0xeb,0xae,0xba,0xeb,0xa0
,0x5d,0x75,0xd7,0x5d,0x75,0xd7,0x5d,0x75,0xd7,0x5d,0x70
,0x79,0xe7,0x9e,0x79,0xe7,0x9e,0x79,0xe7,0x9e,0x79,0xe0
,0xa6,0x9a,0x69,0xa6,0x9a,0x69,0xa6,0x9a,0x69,0xa6,0x90,};

const byte sever_front[] PROGMEM = {6,6,1,1,1,1,1,1,0,1,0,0,1,0,0,1,1,1,1,0,1,0,1,1,0,1,0,1,1,1,1,0,1,1,0,0,1,1,};


void setup() {
  // put your setup code here, to run once:
   gb.begin();
   gb.titleScreen(F("Myth of esmerelda"));
}

void loop() {
  // put your main code here, to run repeatedly:
   if(gb.update()){
    gb.display.setColor(BLACK);{
    gb.display.drawBitmap(0,0,room_1);
   }
   gb.display.setColor(WHITE);{
   gb.display.drawBitmap(1,1,sever_front);

   }
    gb.display.setColor(BLACK);
    }
}
Also don't know if the third gb.display.setColor() is needed.
naed Sat Jul 30, 2016 8:21 am
It doesn't look like this will display a sprite to me
The code for your sprite looks wrong
Should look like your code for the map (0xeb, 0xff...etc,) or there is another way to write a sprite (B00001001, B00100100... Etc)
- Code: Select all
const byte sever_front[] PROGMEM = {6,6,1,1,1,1,1,1,0,1,0,0,1,0,0,1,1,1,1,0,1,0,1,1,0,1,0,1,1,1,1,0,1,1,0,0,1,1,};
The code for your sprite looks wrong
Should look like your code for the map (0xeb, 0xff...etc,) or there is another way to write a sprite (B00001001, B00100100... Etc)
Duhjoker Sat Jul 30, 2016 8:32 am
Ok that makes since!!! Thank you I will try that now.
What about the colours? Do I need to invert maybe?
What about the colours? Do I need to invert maybe?
Duhjoker Sat Jul 30, 2016 9:17 am
Its early moring here so ill catch back up in 8 or 9.
I did try inverting the colors and doing some other change ups after fixing my sever sprite (thank you again for the correction) but i still cant reverse the colors. So the background is neutral and the pixels i drew black.
The sever sprite still refuses to show up too.
I wonder if this has something to do with my encoder. Both the gamebuino and online converters would not pick up my black and neutral sprites. I had to redo them in gray before they would show up?
I did try inverting the colors and doing some other change ups after fixing my sever sprite (thank you again for the correction) but i still cant reverse the colors. So the background is neutral and the pixels i drew black.
The sever sprite still refuses to show up too.
I wonder if this has something to do with my encoder. Both the gamebuino and online converters would not pick up my black and neutral sprites. I had to redo them in gray before they would show up?
Duhjoker Sat Jul 30, 2016 9:30 am
I also save them as png but i could open them up using win paint and save them that way whill give everything not pixeled white.
Sorunome Sat Jul 30, 2016 10:01 am
No worries, you didn't offend me at all, and I hope I didn't offend you either!
As you already found a gamebuino-specific tutorial, if that tutorial is good for you, then there isn't a need to have any more!
As to other tutorials, just through in "arduino tutorial" into your favourite search machine (such as google) and you'll get a ton of results.
Also, on the Getting Started page it does indeed mention the examples, in the Arduino IDE you click on File/Examples and there you have "Gamebuino"
Perhaps I'm not that good of a teacher for all the beginning, so please don't be offended by me and don't be discouraged to ask questions and learn!
As you already found a gamebuino-specific tutorial, if that tutorial is good for you, then there isn't a need to have any more!
As to other tutorials, just through in "arduino tutorial" into your favourite search machine (such as google) and you'll get a ton of results.
Also, on the Getting Started page it does indeed mention the examples, in the Arduino IDE you click on File/Examples and there you have "Gamebuino"
Perhaps I'm not that good of a teacher for all the beginning, so please don't be offended by me and don't be discouraged to ask questions and learn!
naed Sat Jul 30, 2016 7:30 pm
When i loaded up and ran your room you'd created I got a black floor and some walls... Is this not what you wanted? Did you want the floor to be white?
I'm unsure why you would want to invert the colors
I'm unsure why you would want to invert the colors
Duhjoker Sat Jul 30, 2016 8:39 pm
Yes sorry I would like the floor to be white. Here's a pic of how it should look.

naed Sat Jul 30, 2016 8:58 pm
I have no idea how you have encoded the map because it should display exactly how you have drawn it in that pic when encoded
Give me a few mins to get to a pc and I'll help you out
Give me a few mins to get to a pc and I'll help you out
Duhjoker Sat Jul 30, 2016 9:19 pm
Lol no problem!!!
Ok here's an update, I did some experimentation by opening the Piskell web page and drew some crap in the pixel field then exported it to my computer and then opened it up in paint and saved it which completely removes any transparency. I then opened it up on the the bitmap encoder and tried what it spit out and it gave me the correct image when I opened it in simbuino4web.
Ok here's an update, I did some experimentation by opening the Piskell web page and drew some crap in the pixel field then exported it to my computer and then opened it up in paint and saved it which completely removes any transparency. I then opened it up on the the bitmap encoder and tried what it spit out and it gave me the correct image when I opened it in simbuino4web.
naed Sat Jul 30, 2016 9:28 pm
- Code: Select all
//imports the SPI library (needed to communicate with Gamebuino's screen)
#include <SPI.h>
//imports the Gamebuino library
#include <Gamebuino.h>
//creates a Gamebuino object named gb
Gamebuino gb;

const byte map1[] PROGMEM = {88,48,
0x59,0x65,0x96,0x59,0x60,0x0,0x59,0x65,0x96,0x59,0x60,
0xA6,0x9A,0x69,0xA6,0x90,0x0,0xA6,0x9A,0x69,0xA6,0x90,
0x14,0x51,0x45,0x14,0x50,0x0,0x14,0x51,0x45,0x14,0x50,
0xA2,0x8A,0x28,0xA2,0x80,0x0,0xA2,0x8A,0x28,0xA2,0x80,
0x86,0x18,0x61,0x86,0x10,0x0,0x86,0x18,0x61,0x86,0x10,
0x59,0x65,0x96,0x59,0x60,0x0,0x59,0x65,0x96,0x59,0x60,
0x59,0x65,0x80,0x58,0x0,0x0,0x0,0x0,0x0,0x59,0x60,
0xA6,0x9A,0x40,0xA4,0x0,0x0,0x0,0x0,0x0,0xA6,0x90,
0x14,0x51,0x40,0x14,0x0,0x0,0x0,0x0,0x0,0x14,0x50,
0xA2,0x8A,0x0,0xA0,0x0,0x0,0x0,0x0,0x0,0xA2,0x80,
0x86,0x18,0x40,0x84,0x0,0x0,0x0,0x0,0x0,0x86,0x10,
0x59,0x65,0x80,0x58,0x0,0x0,0x0,0x0,0x0,0x59,0x60,
0x59,0x60,0x0,0x0,0x0,0x0,0x0,0x0,0x0,0x59,0x60,
0xA6,0x90,0x0,0x0,0x0,0x0,0x0,0x0,0x0,0xA6,0x90,
0x14,0x50,0x0,0x0,0x0,0x0,0x0,0x0,0x0,0x14,0x50,
0xA2,0x80,0x0,0x0,0x0,0x0,0x0,0x0,0x0,0xA2,0x80,
0x86,0x10,0x0,0x0,0x0,0x0,0x0,0x0,0x0,0x86,0x10,
0x59,0x60,0x0,0x0,0x0,0x0,0x0,0x0,0x0,0x59,0x60,
0x58,0x0,0x0,0x0,0x0,0x0,0x0,0x0,0x0,0x59,0x60,
0xA4,0x0,0x0,0x0,0x0,0x0,0x0,0x0,0x0,0xA6,0x90,
0x14,0x0,0x0,0x0,0x0,0x0,0x0,0x0,0x0,0x14,0x50,
0xA0,0x0,0x0,0x0,0x0,0x0,0x0,0x0,0x0,0xA2,0x80,
0x84,0x0,0x0,0x0,0x0,0x0,0x0,0x0,0x0,0x86,0x10,
0x58,0x0,0x0,0x0,0x0,0x0,0x0,0x0,0x0,0x59,0x60,
0x0,0x0,0x0,0x0,0x0,0x0,0x0,0x0,0x0,0x0,0x0,
0x0,0x0,0x0,0x0,0x0,0x0,0x0,0x0,0x0,0x0,0x0,
0x0,0x0,0x0,0x0,0x0,0x0,0x0,0x0,0x0,0x0,0x0,
0x0,0x0,0x0,0x0,0x0,0x0,0x0,0x0,0x0,0x0,0x0,
0x0,0x0,0x0,0x0,0x0,0x0,0x0,0x0,0x0,0x0,0x0,
0x0,0x0,0x0,0x0,0x0,0x0,0x0,0x0,0x0,0x0,0x0,
0x59,0x60,0x0,0x0,0x0,0x0,0x0,0x0,0x0,0x59,0x60,
0xA6,0x90,0x0,0x0,0x0,0x0,0x0,0x0,0x0,0xA6,0x90,
0x14,0x50,0x0,0x0,0x0,0x0,0x0,0x0,0x0,0x14,0x50,
0xA2,0x80,0x0,0x0,0x0,0x0,0x0,0x0,0x0,0xA2,0x80,
0x86,0x10,0x0,0x0,0x0,0x0,0x0,0x0,0x0,0x86,0x10,
0x59,0x60,0x0,0x0,0x0,0x0,0x0,0x0,0x0,0x59,0x60,
0x59,0x60,0x0,0x0,0x0,0x0,0x0,0x0,0x0,0x59,0x60,
0xA6,0x90,0x0,0x0,0x0,0x0,0x0,0x0,0x0,0xA6,0x90,
0x14,0x50,0x0,0x0,0x0,0x0,0x0,0x0,0x0,0x14,0x50,
0xA2,0x80,0x0,0x0,0x0,0x0,0x0,0x0,0x0,0xA2,0x80,
0x86,0x10,0x0,0x0,0x0,0x0,0x0,0x0,0x0,0x86,0x10,
0x59,0x60,0x0,0x0,0x0,0x0,0x0,0x0,0x0,0x59,0x60,
0x59,0x65,0x96,0x59,0x65,0x96,0x59,0x65,0x96,0x59,0x60,
0xA6,0x9A,0x69,0xA6,0x9A,0x69,0xA6,0x9A,0x69,0xA6,0x90,
0x14,0x51,0x45,0x14,0x51,0x45,0x14,0x51,0x45,0x14,0x50,
0xA2,0x8A,0x28,0xA2,0x8A,0x28,0xA2,0x8A,0x28,0xA2,0x80,
0x86,0x18,0x61,0x86,0x18,0x61,0x86,0x18,0x61,0x86,0x10,
0x59,0x65,0x96,0x59,0x65,0x96,0x59,0x65,0x96,0x59,0x60,
};

// the setup routine runs once when Gamebuino starts up
void setup(){
  // initialize the Gamebuino object
  gb.begin();
  //display the main menu:
  gb.titleScreen(F("Map test"));

}

// the loop routine runs over and over again forever
void loop(){
  //updates the gamebuino (the display, the sound, the auto backlight... everything)
  //returns true when it's time to render a new frame (20 times/second)
  if(gb.update()){
    //prints Hello World! on the screen
    gb.display.drawBitmap(0,0,map1);

  }
}
I rewrote your sprite for you and it displays how you want it to (the above displays your map)
what are you using to make your sprites, i simply fire up Paint and use that then encode it using the bitmap encoder
EDIT
thought i'd help you along a little bit, take a look at the following code this has a player sprite and basic movement / boundary detection, it may just give you a push in the right direction
- Code: Select all
//imports the SPI library (needed to communicate with Gamebuino's screen)
#include <SPI.h>
//imports the Gamebuino library
#include <Gamebuino.h>
//creates a Gamebuino object named gb
Gamebuino gb;

const byte map1[] PROGMEM = {88,48,
0x59,0x65,0x96,0x59,0x60,0x0,0x59,0x65,0x96,0x59,0x60,
0xA6,0x9A,0x69,0xA6,0x90,0x0,0xA6,0x9A,0x69,0xA6,0x90,
0x14,0x51,0x45,0x14,0x50,0x0,0x14,0x51,0x45,0x14,0x50,
0xA2,0x8A,0x28,0xA2,0x80,0x0,0xA2,0x8A,0x28,0xA2,0x80,
0x86,0x18,0x61,0x86,0x10,0x0,0x86,0x18,0x61,0x86,0x10,
0x59,0x65,0x96,0x59,0x60,0x0,0x59,0x65,0x96,0x59,0x60,
0x59,0x65,0x80,0x58,0x0,0x0,0x0,0x0,0x0,0x59,0x60,
0xA6,0x9A,0x40,0xA4,0x0,0x0,0x0,0x0,0x0,0xA6,0x90,
0x14,0x51,0x40,0x14,0x0,0x0,0x0,0x0,0x0,0x14,0x50,
0xA2,0x8A,0x0,0xA0,0x0,0x0,0x0,0x0,0x0,0xA2,0x80,
0x86,0x18,0x40,0x84,0x0,0x0,0x0,0x0,0x0,0x86,0x10,
0x59,0x65,0x80,0x58,0x0,0x0,0x0,0x0,0x0,0x59,0x60,
0x59,0x60,0x0,0x0,0x0,0x0,0x0,0x0,0x0,0x59,0x60,
0xA6,0x90,0x0,0x0,0x0,0x0,0x0,0x0,0x0,0xA6,0x90,
0x14,0x50,0x0,0x0,0x0,0x0,0x0,0x0,0x0,0x14,0x50,
0xA2,0x80,0x0,0x0,0x0,0x0,0x0,0x0,0x0,0xA2,0x80,
0x86,0x10,0x0,0x0,0x0,0x0,0x0,0x0,0x0,0x86,0x10,
0x59,0x60,0x0,0x0,0x0,0x0,0x0,0x0,0x0,0x59,0x60,
0x58,0x0,0x0,0x0,0x0,0x0,0x0,0x0,0x0,0x59,0x60,
0xA4,0x0,0x0,0x0,0x0,0x0,0x0,0x0,0x0,0xA6,0x90,
0x14,0x0,0x0,0x0,0x0,0x0,0x0,0x0,0x0,0x14,0x50,
0xA0,0x0,0x0,0x0,0x0,0x0,0x0,0x0,0x0,0xA2,0x80,
0x84,0x0,0x0,0x0,0x0,0x0,0x0,0x0,0x0,0x86,0x10,
0x58,0x0,0x0,0x0,0x0,0x0,0x0,0x0,0x0,0x59,0x60,
0x0,0x0,0x0,0x0,0x0,0x0,0x0,0x0,0x0,0x0,0x0,
0x0,0x0,0x0,0x0,0x0,0x0,0x0,0x0,0x0,0x0,0x0,
0x0,0x0,0x0,0x0,0x0,0x0,0x0,0x0,0x0,0x0,0x0,
0x0,0x0,0x0,0x0,0x0,0x0,0x0,0x0,0x0,0x0,0x0,
0x0,0x0,0x0,0x0,0x0,0x0,0x0,0x0,0x0,0x0,0x0,
0x0,0x0,0x0,0x0,0x0,0x0,0x0,0x0,0x0,0x0,0x0,
0x59,0x60,0x0,0x0,0x0,0x0,0x0,0x0,0x0,0x59,0x60,
0xA6,0x90,0x0,0x0,0x0,0x0,0x0,0x0,0x0,0xA6,0x90,
0x14,0x50,0x0,0x0,0x0,0x0,0x0,0x0,0x0,0x14,0x50,
0xA2,0x80,0x0,0x0,0x0,0x0,0x0,0x0,0x0,0xA2,0x80,
0x86,0x10,0x0,0x0,0x0,0x0,0x0,0x0,0x0,0x86,0x10,
0x59,0x60,0x0,0x0,0x0,0x0,0x0,0x0,0x0,0x59,0x60,
0x59,0x60,0x0,0x0,0x0,0x0,0x0,0x0,0x0,0x59,0x60,
0xA6,0x90,0x0,0x0,0x0,0x0,0x0,0x0,0x0,0xA6,0x90,
0x14,0x50,0x0,0x0,0x0,0x0,0x0,0x0,0x0,0x14,0x50,
0xA2,0x80,0x0,0x0,0x0,0x0,0x0,0x0,0x0,0xA2,0x80,
0x86,0x10,0x0,0x0,0x0,0x0,0x0,0x0,0x0,0x86,0x10,
0x59,0x60,0x0,0x0,0x0,0x0,0x0,0x0,0x0,0x59,0x60,
0x59,0x65,0x96,0x59,0x65,0x96,0x59,0x65,0x96,0x59,0x60,
0xA6,0x9A,0x69,0xA6,0x9A,0x69,0xA6,0x9A,0x69,0xA6,0x90,
0x14,0x51,0x45,0x14,0x51,0x45,0x14,0x51,0x45,0x14,0x50,
0xA2,0x8A,0x28,0xA2,0x8A,0x28,0xA2,0x8A,0x28,0xA2,0x80,
0x86,0x18,0x61,0x86,0x18,0x61,0x86,0x18,0x61,0x86,0x10,
0x59,0x65,0x96,0x59,0x65,0x96,0x59,0x65,0x96,0x59,0x60,
};

const byte player[] PROGMEM = {8,8,
  B00011100,
  B00011100,
  B00001000,
  B00011100,
  B00101010,
  B00001000,
  B00010100,
  B00100010,
};

  int player_x = 15;
  int player_y = 15;

// the setup routine runs once when Gamebuino starts up
void setup(){
  // initialize the Gamebuino object
  gb.begin();
  //display the main menu:
  gb.titleScreen(F("Map test"));


}

// the loop routine runs over and over again forever
void loop(){
  //updates the gamebuino (the display, the sound, the auto backlight... everything)
  //returns true when it's time to render a new frame (20 times/second)
  if(gb.update()){
    //prints Hello World! on the screen
    gb.display.drawBitmap(0,0,map1);

    gb.display.drawBitmap(player_x,player_y,player);


    if(gb.buttons.repeat(BTN_UP,1)){
      player_y = player_y - 1;}
    if(player_y <= 0){
      player_y = 0;}

    if(gb.buttons.repeat(BTN_DOWN,1)){
      player_y = player_y + 1;}
    if(player_y >= 40){
      player_y = 40;}

    if(gb.buttons.repeat(BTN_RIGHT,1)){
      player_x = player_x + 1;}
    if(player_x >= 77){
      player_x = 77;}

    if(gb.buttons.repeat(BTN_LEFT,1)){
      player_x = player_x - 1;}
    if(player_x <= -2){
      player_x = -2;}

  }
}
Duhjoker Sat Jul 30, 2016 10:04 pm
Aweome you rock!!!!! I will look at that shortly.
I use the piskel online bitmap editor. It has all kinds of features for copying and pasting changing pixel colors and saves them as .png.
Ok I'm still having trouble displaying my sever sprite.i went ahead and changed my bitmap using paint to save it with white tiles and exchanged the room bitmap with the updated bitmap. I think its a color issue but i still have the color all mixed up and don't know which to change.
heres the code i added a logo screen but unsure how to add it.
I use the piskel online bitmap editor. It has all kinds of features for copying and pasting changing pixel colors and saves them as .png.
Ok I'm still having trouble displaying my sever sprite.i went ahead and changed my bitmap using paint to save it with white tiles and exchanged the room bitmap with the updated bitmap. I think its a color issue but i still have the color all mixed up and don't know which to change.
heres the code i added a logo screen but unsure how to add it.
- Code: Select all
#include <SPI.h>
#include <Gamebuino.h>
Gamebuino gb;

const byte logo[] = {88,48,
0xfe,0xef,0x7f,0xff,0xff,0xff,0xff,0xff,0xef,0xdf,0xf0
,0xf6,0xdf,0xbf,0xff,0xff,0xff,0xff,0xff,0xdf,0xff,0x70
,0xf7,0xbb,0xbf,0xff,0xff,0xff,0xff,0xff,0xdd,0xef,0xf0
,0xef,0x77,0x71,0x51,0xdd,0x74,0x57,0xfc,0xee,0xf7,0x70
,0xfe,0xfe,0xfb,0x57,0xc9,0x26,0xd7,0xfb,0xf7,0x7f,0xb0
,0x7d,0xbe,0xfb,0x13,0xd5,0xde,0xc7,0x89,0xf6,0xf7,0x70
,0xb3,0xdd,0xfb,0x57,0xdd,0xde,0xd7,0xab,0xfb,0xeb,0xf0
,0xcf,0xf7,0xfb,0x51,0xdd,0xde,0xd7,0x8b,0xfc,0xbd,0xe0
,0xff,0xff,0xff,0xff,0xff,0xff,0xff,0xff,0xff,0xff,0x10
,0xff,0xff,0xff,0xff,0xff,0xff,0xff,0xff,0xff,0xff,0xf0
,0xff,0xff,0xff,0xff,0xff,0xff,0xff,0xff,0xff,0xff,0xf0
,0xff,0x8f,0x03,0x88,0xe1,0xc1,0xc3,0xbf,0x0f,0x9f,0xf0
,0xff,0xb6,0xfd,0x77,0x5e,0xbe,0xbd,0x5e,0xf7,0x6f,0xf0
,0xff,0x6d,0xe1,0x7f,0x51,0xa2,0xa3,0x5e,0xfa,0xf7,0xf0
,0xfe,0xdd,0xdf,0x7f,0x57,0xa2,0xaf,0x5e,0x8a,0x97,0xf0
,0xfe,0xbd,0xdf,0x7f,0x57,0xbe,0xaf,0x5e,0xaa,0x9b,0xf0
,0xfd,0x8d,0xc3,0x49,0x51,0xbd,0xa3,0x5e,0xaa,0xfb,0xf0
,0xfb,0xf5,0xfd,0x55,0x5e,0xbb,0xbd,0x5e,0xaa,0xdb,0xf0
,0xfb,0x0e,0x3d,0x5d,0x59,0xbd,0xb3,0x5e,0xaa,0xad,0xf0
,0xf6,0x7f,0xdd,0x5d,0x57,0xb6,0xaf,0x5e,0xaa,0xb5,0xf0
,0xf5,0xff,0xdd,0x5d,0x57,0xaa,0xaf,0x5e,0x8a,0xb6,0xf0
,0xec,0x0c,0x1d,0x5d,0x51,0xaa,0xa3,0x46,0xfa,0xba,0xf0
,0xef,0xf5,0xfb,0x5d,0x5e,0xaa,0xbd,0x7a,0xf6,0xbb,0x70
,0xe0,0x0e,0x07,0x9e,0x61,0x88,0xc3,0x87,0x0f,0x7c,0x70
,0xff,0xff,0xff,0xff,0xff,0xff,0xff,0xff,0xff,0xff,0xf0
,0xff,0xff,0xff,0xff,0xff,0xff,0xff,0xff,0xff,0xff,0xf0
,0xff,0xff,0xff,0xff,0xff,0xff,0xff,0xff,0xff,0xff,0xf0
,0xff,0xff,0xff,0x39,0x8c,0xe7,0xff,0x7f,0xff,0xff,0xf0
,0x7b,0xff,0xfe,0xd6,0xbb,0x5b,0xfe,0xbf,0xff,0xfd,0xe0
,0xa7,0xff,0xfe,0xd6,0x8d,0xef,0xfe,0xbf,0xff,0xfe,0x90
,0xa6,0x9f,0xfe,0x31,0xbe,0xf7,0xfe,0x3f,0xff,0xa6,0x90
,0x59,0x6f,0xfe,0xf5,0xbb,0x5b,0xfe,0xbf,0xff,0x59,0x60
,0xeb,0xaf,0xfe,0xf6,0x8c,0xe7,0xfe,0xbf,0xff,0xeb,0xa0
,0x5d,0x7f,0xff,0xff,0xff,0xff,0xff,0xff,0xff,0x5d,0x70
,0x79,0xef,0xff,0xff,0xff,0xff,0xff,0xff,0xff,0x79,0xe0
,0xa6,0x9f,0xff,0xff,0xff,0xff,0xff,0xff,0xff,0xa6,0x90
,0xa6,0x9a,0x69,0xff,0xff,0xe9,0xa6,0x9a,0x69,0xa6,0x90
,0x59,0x65,0x96,0xff,0xff,0xd6,0x59,0x65,0x96,0x59,0x60
,0xeb,0xae,0xba,0xff,0xff,0xfa,0xeb,0xae,0xba,0xeb,0xa0
,0x5d,0x75,0xd7,0x55,0x55,0x57,0x5d,0x75,0xd7,0x5d,0x70
,0x79,0xe7,0x9e,0xaa,0xaa,0x9e,0x79,0xe7,0x9e,0x79,0xe0
,0xa6,0x9a,0x69,0xff,0xff,0xe9,0xa6,0x9a,0x69,0xa6,0x90
,0xa6,0x9a,0x69,0xaa,0xaa,0xa9,0xa6,0x9a,0x69,0xa6,0x90
,0x59,0x65,0x97,0x55,0x55,0x56,0x59,0x65,0x96,0x59,0x60
,0xeb,0xae,0xba,0x7f,0xff,0xfa,0xeb,0xae,0xba,0xeb,0xa0
,0x5d,0x75,0xd7,0xaa,0xaa,0x97,0x5d,0x75,0xd7,0x5d,0x70
,0x79,0xe7,0x9e,0x55,0x55,0x5e,0x79,0xe7,0x9e,0x79,0xe0
,0xa6,0x9a,0x69,0x7f,0xff,0xe9,0xa6,0x9a,0x69,0xa6,0x90,};

const byte PROGMEM room_1[] = {88,48,
0x59,0x65,0x96,0x59,0x60,0x00,0x59,0x65,0x96,0x59,0x60
,0xa6,0x9a,0x69,0xa6,0x90,0x00,0xa6,0x9a,0x69,0xa6,0x90
,0x14,0x51,0x45,0x14,0x50,0x00,0x14,0x51,0x45,0x14,0x50
,0xa2,0x8a,0x28,0xa2,0x80,0x00,0xa2,0x8a,0x28,0xa2,0x80
,0x86,0x18,0x61,0x86,0x10,0x00,0x86,0x18,0x61,0x86,0x10
,0x59,0x65,0x96,0x59,0x60,0x00,0x59,0x65,0x96,0x59,0x60
,0x59,0x65,0x80,0x58,0x00,0x00,0x00,0x00,0x00,0x59,0x60
,0xa6,0x9a,0x40,0xa4,0x00,0x00,0x00,0x00,0x00,0xa6,0x90
,0x14,0x51,0x40,0x14,0x00,0x00,0x00,0x00,0x00,0x14,0x50
,0xa2,0x8a,0x00,0xa0,0x00,0x00,0x00,0x00,0x00,0xa2,0x80
,0x86,0x18,0x40,0x84,0x00,0x00,0x00,0x00,0x00,0x86,0x10
,0x59,0x65,0x80,0x58,0x00,0x00,0x00,0x00,0x00,0x59,0x60
,0x59,0x60,0x00,0x00,0x00,0x00,0x00,0x00,0x00,0x59,0x60
,0xa6,0x90,0x00,0x00,0x00,0x00,0x00,0x00,0x00,0xa6,0x90
,0x14,0x50,0x00,0x00,0x00,0x00,0x00,0x00,0x00,0x14,0x50
,0xa2,0x80,0x00,0x00,0x00,0x00,0x00,0x00,0x00,0xa2,0x80
,0x86,0x10,0x00,0x00,0x00,0x00,0x00,0x00,0x00,0x86,0x10
,0x59,0x60,0x00,0x00,0x00,0x00,0x00,0x00,0x00,0x59,0x60
,0x58,0x00,0x00,0x00,0x00,0x00,0x00,0x00,0x00,0x59,0x60
,0xa4,0x00,0x00,0x00,0x00,0x00,0x00,0x00,0x00,0xa6,0x90
,0x14,0x00,0x00,0x00,0x00,0x00,0x00,0x00,0x00,0x14,0x50
,0xa0,0x00,0x00,0x00,0x00,0x00,0x00,0x00,0x00,0xa2,0x80
,0x84,0x00,0x00,0x00,0x00,0x00,0x00,0x00,0x00,0x86,0x10
,0x58,0x00,0x00,0x00,0x00,0x00,0x00,0x00,0x00,0x59,0x60
,0x00,0x00,0x00,0x00,0x00,0x00,0x00,0x00,0x00,0x00,0x00
,0x00,0x00,0x00,0x00,0x00,0x00,0x00,0x00,0x00,0x00,0x00
,0x00,0x00,0x00,0x00,0x00,0x00,0x00,0x00,0x00,0x00,0x00
,0x00,0x00,0x00,0x00,0x00,0x00,0x00,0x00,0x00,0x00,0x00
,0x00,0x00,0x00,0x00,0x00,0x00,0x00,0x00,0x00,0x00,0x00
,0x00,0x00,0x00,0x00,0x00,0x00,0x00,0x00,0x00,0x00,0x00
,0x59,0x60,0x00,0x00,0x00,0x00,0x00,0x00,0x00,0x59,0x60
,0xa6,0x90,0x00,0x00,0x00,0x00,0x00,0x00,0x00,0xa6,0x90
,0x14,0x50,0x00,0x00,0x00,0x00,0x00,0x00,0x00,0x14,0x50
,0xa2,0x80,0x00,0x00,0x00,0x00,0x00,0x00,0x00,0xa2,0x80
,0x86,0x10,0x00,0x00,0x00,0x00,0x00,0x00,0x00,0x86,0x10
,0x59,0x60,0x00,0x00,0x00,0x00,0x00,0x00,0x00,0x59,0x60
,0x59,0x60,0x00,0x00,0x00,0x00,0x00,0x00,0x00,0x59,0x60
,0xa6,0x90,0x00,0x00,0x00,0x00,0x00,0x00,0x00,0xa6,0x90
,0x14,0x50,0x00,0x00,0x00,0x00,0x00,0x00,0x00,0x14,0x50
,0xa2,0x80,0x00,0x00,0x00,0x00,0x00,0x00,0x00,0xa2,0x80
,0x86,0x10,0x00,0x00,0x00,0x00,0x00,0x00,0x00,0x86,0x10
,0x59,0x60,0x00,0x00,0x00,0x00,0x00,0x00,0x00,0x59,0x60
,0x59,0x65,0x96,0x59,0x65,0x96,0x59,0x65,0x96,0x59,0x60
,0xa6,0x9a,0x69,0xa6,0x9a,0x69,0xa6,0x9a,0x69,0xa6,0x90
,0x14,0x51,0x45,0x14,0x51,0x45,0x14,0x51,0x45,0x14,0x50
,0xa2,0x8a,0x28,0xa2,0x8a,0x28,0xa2,0x8a,0x28,0xa2,0x80
,0x86,0x18,0x61,0x86,0x18,0x61,0x86,0x18,0x61,0x86,0x10
,0x59,0x65,0x96,0x59,0x65,0x96,0x59,0x65,0x96,0x59,0x60,};


const byte sever_front[] PROGMEM = {6,6,
B111111,
B010010,
B011110,
B101101,
B011110,
B110011,};


void setup() {
  // put your setup code here, to run once:
   gb.begin();
   gb.titleScreen(F("Myth of esmerelda"));
}

void loop() {
  // put your main code here, to run repeatedly:
   if(gb.update()){
    gb.display.setColor(INVERT);{
    gb.display.drawBitmap(0,0,room_1);
   }
   gb.display.setColor(BLACK);{
   gb.display.drawBitmap(1,1,sever_front);

   }
   gb.display.setColor(WHITE);{
   }
   }
}
naed Sat Jul 30, 2016 10:19 pm
i only ever use two colours when creating a sprite - black and white, this ensures it it encoded correctly
if you want grey colours adding to your sprite you would draw them in black/white first, then encode them then your code would tell the gamebuino to display it as grey
I think you have some other colours when creating your sprite and this is stopping you encoding it correctly
i can also see you have inverted the colours of your map on the above post - you shouldn't need to do this and it is just a waste of code and messy, I already posted correctly encoded code for your map that doesn't require any modification to be displayed
if you want grey colours adding to your sprite you would draw them in black/white first, then encode them then your code would tell the gamebuino to display it as grey
I think you have some other colours when creating your sprite and this is stopping you encoding it correctly
i can also see you have inverted the colours of your map on the above post - you shouldn't need to do this and it is just a waste of code and messy, I already posted correctly encoded code for your map that doesn't require any modification to be displayed
Duhjoker Sat Jul 30, 2016 10:33 pm
Ok thank you!!!
naed Sat Jul 30, 2016 10:57 pm
ok, I've been playing around with this and have a question myself that i cannot figure out, can anyone point me in the right direction?
if Duhjoker uses one big sprite as the background, how can we detect collisions with his rocks (as they are part of the full screen sprite)
would it be easier to create a tilemap for the rooms, and also would this be easier to create collision detection?
i created the tilemap no problems, but playing around with the following didn't get me the intended results
Physics:
gb.collidePointRect(x1,y1,x2,y2,w,h)
gb.collideRectRect(x1,y1,w1,h1,x2,y2,w2,h2)
gb.collideBitmapBitmap(x1, y1, b1, x2, y2, b2)
if Duhjoker uses one big sprite as the background, how can we detect collisions with his rocks (as they are part of the full screen sprite)
would it be easier to create a tilemap for the rooms, and also would this be easier to create collision detection?
i created the tilemap no problems, but playing around with the following didn't get me the intended results
Physics:
gb.collidePointRect(x1,y1,x2,y2,w,h)
gb.collideRectRect(x1,y1,w1,h1,x2,y2,w2,h2)
gb.collideBitmapBitmap(x1, y1, b1, x2, y2, b2)
Duhjoker Sun Jul 31, 2016 6:59 am
EDITED:::::
Programmed black and grey player sprites correctly. Setting frame rate to anything above 60 FPS to look good. But there is a skip about every 20 frames that makes it look funny no mater what speed. But I can deal with it though.
Ok on your movement exampl I understand that X and Y and vX and Vy are coordinates in space or on screen as it is. How do you get the integers in the brackets or what do they mean?
Also how can I add orientation to the movements? I know player.orientation= but are the integers the numbers of the sprites after doing [num_sprites]? And would I do it once for each color? Do i also need to do a gb.display for each orientation and color?
Please don't forget to read Naeds post above any one with knowledge of the collision variables.
Programmed black and grey player sprites correctly. Setting frame rate to anything above 60 FPS to look good. But there is a skip about every 20 frames that makes it look funny no mater what speed. But I can deal with it though.
Ok on your movement exampl I understand that X and Y and vX and Vy are coordinates in space or on screen as it is. How do you get the integers in the brackets or what do they mean?
Also how can I add orientation to the movements? I know player.orientation= but are the integers the numbers of the sprites after doing [num_sprites]? And would I do it once for each color? Do i also need to do a gb.display for each orientation and color?
Please don't forget to read Naeds post above any one with knowledge of the collision variables.
naed Sun Jul 31, 2016 11:47 am
your movement exampl I understand that X and Y and vX and Vy are coordinates in space or on screen as it is. How do you get the integers in the brackets or what do they mean?
Which part are you referring to?
EDIT
after lots of searching and reading about collision data i think i may have sorted out the collision part of the code
let me get to my pc a bit later and i'll post an update here if i get it to work
Duhjoker Sun Jul 31, 2016 10:09 pm
ok here is part of what you gave me.......
I added comments to the parts I was asking about.
Also on adding sprite orientation how would write the prameters to display a sprite when hes looking or being told which direction to go and then add it to the controls?
- Code: Select all
    if(gb.buttons.repeat(BTN_UP,1)){
      player_y = player_y - 1;}
    if(player_y <= 0){     //////////// what are these integers, how are they calculated
      player_y = 0;}          //////////// what are these integers, how are they calculated

    if(gb.buttons.repeat(BTN_DOWN,1)){
      player_y = player_y + 1;}
    if(player_y >= 40){      //////////// what are these integers, how are they calculated
      player_y = 40;}       //////////// what are these integers, how are they calculated

    if(gb.buttons.repeat(BTN_RIGHT,1)){
      player_x = player_x + 1;}
    if(player_x >= 77){    //////////// what are these integers, how are they calculated
      player_x = 77;}       //////////// what are these integers, how are they calculated

    if(gb.buttons.repeat(BTN_LEFT,1)){
      player_x = player_x - 1;}
    if(player_x <= -2){   //////////// what are these integers, how are they calculated
      player_x = -2;}    ///////////// what are these integers, how are they calculated

  }
}
I added comments to the parts I was asking about.
Also on adding sprite orientation how would write the prameters to display a sprite when hes looking or being told which direction to go and then add it to the controls?
- Code: Select all
gb.display.drawBitmap(player_x,player_y,player);
naed Sun Jul 31, 2016 10:58 pm
- Code: Select all
if(gb.buttons.repeat(BTN_UP,1)){
      player_y = player_y - 1;}
    if(player_y <= 0){     //////////// If player co-ords equal less than or equal to zero (zero being the edge of the screen)
      player_y = 0;}          //////////// Make player co-ords zero (bring player back intob the screen
The integers are simply there to set the bounties to the edge of the gamebuinos screen
To make your player sprite change direction you could simply add the displayBitmap function under the direction controls for each of your sprites
- Code: Select all
if(gb.buttons.repeat(BTN_UP,1)){
gb.display.drawBitmap(player_x,player_y,sprite_up);
}
I haven't tested this but don't see why it wouldn't work
Duhjoker Sun Jul 31, 2016 11:43 pm
Oh OK!!! Thank you!!!
Looks simple enough I'll make a copy of the current build and play with it. Also don't they need the vertical coordinates Or the VX VY on a couple?
Looks simple enough I'll make a copy of the current build and play with it. Also don't they need the vertical coordinates Or the VX VY on a couple?
Duhjoker Mon Aug 01, 2016 4:04 am
I'm learning yay!!!!! At least I think I am.
Just now got around to booting up my laptop to try adding a different set of sprites to each control direction and it works but I removed the first gb.display.drawbitmap() from the beginning thinking the character would face the last direction but it doesn't work that way I see now and because I removed the first set of code you only see it when pressing a direction.
Easy fix but it presents a new question how can I make the player sprite stay in the direction of the last button pushed.
I also had a question regarding the light sensor. I remember that besides the d-pad buttons LOZ requires 4 more buttons. A, B, select and start to use certain features of the game. Like the start menu to change items and to save and what not. I was thinking at some point that we coulkd utilize that component to create an extra button. Where you could hold your finger over it to make it see dark and hold a certain d-pad direction as a failsafe so its not done accidently.
Just now got around to booting up my laptop to try adding a different set of sprites to each control direction and it works but I removed the first gb.display.drawbitmap() from the beginning thinking the character would face the last direction but it doesn't work that way I see now and because I removed the first set of code you only see it when pressing a direction.
Easy fix but it presents a new question how can I make the player sprite stay in the direction of the last button pushed.
I also had a question regarding the light sensor. I remember that besides the d-pad buttons LOZ requires 4 more buttons. A, B, select and start to use certain features of the game. Like the start menu to change items and to save and what not. I was thinking at some point that we coulkd utilize that component to create an extra button. Where you could hold your finger over it to make it see dark and hold a certain d-pad direction as a failsafe so its not done accidently.
naed Mon Aug 01, 2016 8:21 am
Duhjoker wrote:Oh OK!!! Thank you!!!
Looks simple enough I'll make a copy of the current build and play with it. Also don't they need the vertical coordinates Or the VX VY on a couple?
not for the screen boundaries as you'll only hit the top of the screen if your pressing up, that's why the boundaries are set to stop you going out of the top of the screen when going upwards
Duhjoker Mon Aug 01, 2016 8:31 am
That makes since.
I've been looking around for how to set the orientation after a button press but coming up short. I found a couple commands that I thought might work but can't find any reference or threads mentioning them. I'm wondering if it might need a new set of commands to add to the regular movement commands.
Maybe an else/if statement or a command after the button release like gb.display.bitmap after the button release command
I've been looking around for how to set the orientation after a button press but coming up short. I found a couple commands that I thought might work but can't find any reference or threads mentioning them. I'm wondering if it might need a new set of commands to add to the regular movement commands.
Maybe an else/if statement or a command after the button release like gb.display.bitmap after the button release command
Duhjoker Mon Aug 01, 2016 8:52 am
How about
Would i need to code another groupset with the if.(gb.button.released etc like with the buttons pressed or would i put one command under each direction?
- Code: Select all
  if(gb.buttons.released(BTN_UP))
  gb.display.drawBitmap(player_x,player_y,spriteId);
Would i need to code another groupset with the if.(gb.button.released etc like with the buttons pressed or would i put one command under each direction?
naed Mon Aug 01, 2016 7:45 pm
What about
EDIT
Lol your previous post didn't show for me but we're thinking the same thing
- Code: Select all
gb.buttons.released

Description

Function used to know when a given button is released.
EDIT
Lol your previous post didn't show for me but we're thinking the same thing
Duhjoker Mon Aug 01, 2016 8:24 pm
Awesome!!!!
Ok so no if and it works? Do I use this command at one for each set of button punches or do I create a separate list below the buttons pressed code.
Ok so no if and it works? Do I use this command at one for each set of button punches or do I create a separate list below the buttons pressed code.
Duhjoker Mon Aug 01, 2016 11:30 pm
All right I tried to implement the button release command to lock its orientation. Its working kind of. It now stays locked on sever_rear. Also the whole room bitmap screen is flickering like the sprite and it wasn't before and the character now moves supper fast.
- Code: Select all
//imports the SPI library (needed to communicate with Gamebuino's screen)
#include <SPI.h>
//imports the Gamebuino library
#include <Gamebuino.h>
//creates a Gamebuino object named gb
Gamebuino gb;

const byte room_1[] PROGMEM = {88,48,
0x59,0x65,0x96,0x59,0x60,0x00,0x59,0x65,0x96,0x59,0x60
,0xa6,0x9a,0x69,0xa6,0x90,0x00,0xa6,0x9a,0x69,0xa6,0x90
,0x14,0x51,0x45,0x14,0x50,0x00,0x14,0x51,0x45,0x14,0x50
,0xa2,0x8a,0x28,0xa2,0x80,0x00,0xa2,0x8a,0x28,0xa2,0x80
,0x86,0x18,0x61,0x86,0x10,0x00,0x86,0x18,0x61,0x86,0x10
,0x59,0x65,0x96,0x59,0x60,0x00,0x59,0x65,0x96,0x59,0x60
,0x59,0x65,0x80,0x58,0x00,0x00,0x00,0x00,0x00,0x59,0x60
,0xa6,0x9a,0x40,0xa4,0x00,0x00,0x00,0x00,0x00,0xa6,0x90
,0x14,0x51,0x40,0x14,0x00,0x00,0x00,0x00,0x00,0x14,0x50
,0xa2,0x8a,0x00,0xa0,0x00,0x00,0x00,0x00,0x00,0xa2,0x80
,0x86,0x18,0x40,0x84,0x00,0x00,0x00,0x00,0x00,0x86,0x10
,0x59,0x65,0x80,0x58,0x00,0x00,0x00,0x00,0x00,0x59,0x60
,0x59,0x60,0x00,0x00,0x00,0x00,0x00,0x00,0x00,0x59,0x60
,0xa6,0x90,0x00,0x00,0x00,0x00,0x00,0x00,0x00,0xa6,0x90
,0x14,0x50,0x00,0x00,0x00,0x00,0x00,0x00,0x00,0x14,0x50
,0xa2,0x80,0x00,0x00,0x00,0x00,0x00,0x00,0x00,0xa2,0x80
,0x86,0x10,0x00,0x00,0x00,0x00,0x00,0x00,0x00,0x86,0x10
,0x59,0x60,0x00,0x00,0x00,0x00,0x00,0x00,0x00,0x59,0x60
,0x58,0x00,0x00,0x00,0x00,0x00,0x00,0x00,0x00,0x59,0x60
,0xa4,0x00,0x00,0x00,0x00,0x00,0x00,0x00,0x00,0xa6,0x90
,0x14,0x00,0x00,0x00,0x00,0x00,0x00,0x00,0x00,0x14,0x50
,0xa0,0x00,0x00,0x00,0x00,0x00,0x00,0x00,0x00,0xa2,0x80
,0x84,0x00,0x00,0x00,0x00,0x00,0x00,0x00,0x00,0x86,0x10
,0x58,0x00,0x00,0x00,0x00,0x00,0x00,0x00,0x00,0x59,0x60
,0x00,0x00,0x00,0x00,0x00,0x00,0x00,0x00,0x00,0x00,0x00
,0x00,0x00,0x00,0x00,0x00,0x00,0x00,0x00,0x00,0x00,0x00
,0x00,0x00,0x00,0x00,0x00,0x00,0x00,0x00,0x00,0x00,0x00
,0x00,0x00,0x00,0x00,0x00,0x00,0x00,0x00,0x00,0x00,0x00
,0x00,0x00,0x00,0x00,0x00,0x00,0x00,0x00,0x00,0x00,0x00
,0x00,0x00,0x00,0x00,0x00,0x00,0x00,0x00,0x00,0x00,0x00
,0x59,0x60,0x00,0x00,0x00,0x00,0x00,0x00,0x00,0x59,0x60
,0xa6,0x90,0x00,0x00,0x00,0x00,0x00,0x00,0x00,0xa6,0x90
,0x14,0x50,0x00,0x00,0x00,0x00,0x00,0x00,0x00,0x14,0x50
,0xa2,0x80,0x00,0x00,0x00,0x00,0x00,0x00,0x00,0xa2,0x80
,0x86,0x10,0x00,0x00,0x00,0x00,0x00,0x00,0x00,0x86,0x10
,0x59,0x60,0x00,0x00,0x00,0x00,0x00,0x00,0x00,0x59,0x60
,0x59,0x60,0x00,0x00,0x00,0x00,0x00,0x00,0x00,0x59,0x60
,0xa6,0x90,0x00,0x00,0x00,0x00,0x00,0x00,0x00,0xa6,0x90
,0x14,0x50,0x00,0x00,0x00,0x00,0x00,0x00,0x00,0x14,0x50
,0xa2,0x80,0x00,0x00,0x00,0x00,0x00,0x00,0x00,0xa2,0x80
,0x86,0x10,0x00,0x00,0x00,0x00,0x00,0x00,0x00,0x86,0x10
,0x59,0x60,0x00,0x00,0x00,0x00,0x00,0x00,0x00,0x59,0x60
,0x59,0x65,0x96,0x59,0x65,0x96,0x59,0x65,0x96,0x59,0x60
,0xa6,0x9a,0x69,0xa6,0x9a,0x69,0xa6,0x9a,0x69,0xa6,0x90
,0x14,0x51,0x45,0x14,0x51,0x45,0x14,0x51,0x45,0x14,0x50
,0xa2,0x8a,0x28,0xa2,0x8a,0x28,0xa2,0x8a,0x28,0xa2,0x80
,0x86,0x18,0x61,0x86,0x18,0x61,0x86,0x18,0x61,0x86,0x10
,0x59,0x65,0x96,0x59,0x65,0x96,0x59,0x65,0x96,0x59,0x60,};


const byte sever_front_1[] PROGMEM = {8,6,0x78,0x0,0x0,0x30,0x0,0xcc,};
const byte sever_front_2[] PROGMEM = {8,6,0x84,0x48,0x78,0x84,0x78,0x0,};
const byte sever_left_1[] PROGMEM = {8,6,0x78,0x80,0xc8,0xb4,0x0,0xcc,};
const byte sever_left_2[] PROGMEM = {8,6,0x4,0x58,0x30,0x0,0x78,0x0,};
const byte sever_rear_1[] PROGMEM = {8,6,0X78,0X78,0X0,0X30,0X0,0XCC,};
const byte sever_rear_2[] PROGMEM = {8,6,0x84,0x0,0x78,0x84,0x78,0x0,};
const byte sever_right_1[] PROGMEM = {8,6,0x78,0x4,0x4c,0xb4,0x0,0xcc,};
const byte sever_right_2[] PROGMEM = {8,6,0x80,0x68,0x30,0x0,0x78,0x0,};

  int player_x = 15;
  int player_y = 15;

// the setup routine runs once when Gamebuino starts up
void setup(){
  // initialize the Gamebuino object
  gb.begin();
  //display the main menu:
  gb.titleScreen(F("Myth of ESmerelda"));
  gb.setFrameRate(80);

}

// the loop routine runs over and over again forever
void loop(){
  //updates the gamebuino (the display, the sound, the auto backlight... everything)
  //returns true when it's time to render a new frame (20 times/second)
  if(gb.update()){
    //prints Hello World! on the screen
    gb.display.drawBitmap(0,0,room_1);

     gb.display.setColor(BLACK);{
    gb.display.drawBitmap(player_x,player_y,sever_front_1);
    }

    gb.display.setColor(GRAY);{
    gb.display.drawBitmap(player_x,player_y,sever_front_2);
    }

    if(gb.buttons.repeat(BTN_UP,1)){
       gb.display.setColor(BLACK);{
    gb.display.drawBitmap(player_x,player_y,sever_rear_1);
    }
    gb.display.setColor(GRAY);{
    gb.display.drawBitmap(player_x,player_y,sever_rear_2);
    }
      player_y = player_y - 1;}
    if(player_y <= 0){
      player_y = 0;}
  }
    gb.buttons.released(BTN_UP);{                                                    ////////added for orientation
       gb.display.setColor(BLACK);{                                                     ////////added for orientation
    gb.display.drawBitmap(player_x,player_y,sever_rear_1);              ////////added for orientation
    }
    gb.display.setColor(GRAY);{                                                          ////////added for orientation
    gb.display.drawBitmap(player_x,player_y,sever_rear_2);              ////////added for orientation
    }
    }


    if(gb.buttons.repeat(BTN_DOWN,1)){
      gb.display.setColor(BLACK);{
    gb.display.drawBitmap(player_x,player_y,sever_front_1);
    }
     gb.display.setColor(GRAY);{
    gb.display.drawBitmap(player_x,player_y,sever_front_2);
    }
      player_y = player_y + 1;}
    if(player_y >= 40){
      player_y = 40;}


    if(gb.buttons.repeat(BTN_RIGHT,1)){
       gb.display.setColor(BLACK);{
    gb.display.drawBitmap(player_x,player_y,sever_right_1);
    }
     gb.display.setColor(GRAY);{
    gb.display.drawBitmap(player_x,player_y,sever_right_2);
    }
      player_x = player_x + 1;}
    if(player_x >= 77){
      player_x = 77;}


    if(gb.buttons.repeat(BTN_LEFT,1)){
       gb.display.setColor(BLACK);{
    gb.display.drawBitmap(player_x,player_y,sever_left_1);
    }
    gb.display.setColor(GRAY);{
    gb.display.drawBitmap(player_x,player_y,sever_left_2);
    }
      player_x = player_x - 1;}
    if(player_x <= -2){
      player_x = -2;}

  }
naed Mon Aug 01, 2016 11:45 pm
you could try this, i didn't get good results from the button release way, so just came up with another way (probably not the best way but it certainly works)
i'll post the whole code here and you can take a look
i'll post the whole code here and you can take a look
- Code: Select all
#include <SPI.h>
#include <Gamebuino.h>
Gamebuino gb;

    //map followed by tilesprites

     const byte

tilemap[] PROGMEM = {14,8,
6,6,
1,1,1,1,1,1,0,0,1,1,1,1,1,1,
1,1,1,0,1,0,0,0,0,0,0,0,1,1,
1,1,0,0,0,0,0,0,0,0,0,0,1,1,
1,0,0,0,0,0,0,0,0,0,0,0,1,1,
0,0,0,0,0,0,0,0,0,0,0,0,0,0,
1,1,0,0,0,0,0,0,0,0,0,0,1,1,
1,1,0,0,0,0,0,0,0,0,0,0,1,1,
1,1,1,1,1,1,1,1,1,1,1,1,1,1};

const byte blank[] PROGMEM = {
B00000000,
B00000000,
B00000000,
B00000000,
B00000000,
B00000000 } ;

const byte rock[] PROGMEM = {
B01011000,
B10100100,
B00010100,
B10100000,
B10000100,
B01011000 } ;


const byte *spritesheet[] = { blank, rock };

const byte player[] PROGMEM = {8,6,
B111111,
B010010,
B011110,
B101101,
B011110,
B110011,};

const byte up[] PROGMEM = {8,6,
B001100,
B011110,
B101101,
B001100,
B001100,
B001100,};

const byte down[] PROGMEM = {8,6,
B001100,
B001100,
B001100,
B101101,
B011110,
B001100,};

const byte right[] PROGMEM = {8,6,
B000100,
B000010,
B111111,
B111111,
B000010,
B000100,};

const byte left[] PROGMEM = {8,6,
B001000,
B010000,
B111111,
B111111,
B010000,
B001000,};


  int player_x = 15;
  int player_y = 15;
  int player_direction = 0;

int x=0,y=0;


void setup() {
  gb.begin();
  gb.titleScreen(F("test"));
  gb.display.persistence = false;
}
void loop() {
  if(gb.update()){
    if (gb.buttons.repeat(BTN_RIGHT,1));
    if (gb.buttons.repeat(BTN_LEFT,1));
    if (gb.buttons.repeat(BTN_DOWN,1));
    if (gb.buttons.repeat(BTN_UP,1));
    gb.display.drawTilemap(x,y,tilemap,spritesheet); // draw the tilemap
//    gb.display.cursorY = 12; gb.display.println( x );gb.display.println( y );


    if(gb.buttons.repeat(BTN_UP,1)){
      gb.display.drawBitmap(player_x,player_y,up);
      player_direction = 1;
      player_y = player_y - 1;}
    if(player_y <= 0){
      player_y = 0;}

    if(gb.buttons.repeat(BTN_DOWN,1)){
      gb.display.drawBitmap(player_x,player_y,down);
      player_direction = 2;
      player_y = player_y + 1;}
    if(player_y >= 40){
      player_y = 40;}


    if(gb.buttons.repeat(BTN_RIGHT,1)){
      gb.display.drawBitmap(player_x,player_y,right);
      player_direction = 3;
      player_x = player_x + 1;}
    if(player_x >= 77){
      player_x = 77;}

    if(gb.buttons.repeat(BTN_LEFT,1)){
      gb.display.drawBitmap(player_x,player_y,left);
      player_direction = 4;
      player_x = player_x - 1;}
    if(player_x <= -2){
      player_x = -2;}


////////PLAYER DIRECTION//////////////
      if (player_direction == 1){
        gb.display.drawBitmap(player_x,player_y,up);
      }
      else if (player_direction == 2){
        gb.display.drawBitmap(player_x,player_y,down);
      }
      else if (player_direction == 3){
        gb.display.drawBitmap(player_x,player_y,right);
      }
      else if (player_direction == 4){
        gb.display.drawBitmap(player_x,player_y,left);
      }
      else { gb.display.drawBitmap(player_x,player_y,down);
      }


    }
}
Duhjoker Tue Aug 02, 2016 1:37 am
Hmmmm I get an error on drawTilemap. It says no member named tileMap. I guess I need to find the library for it.
Duhjoker Tue Aug 02, 2016 2:22 am
Went through all my posts after remembering what sorunome said about the Tilemap routine and found the updated library that includes the tilemap parts. The link to this repository is not included in the wiki so make sure you use this library when using the tilemap command.
https://github.com/Sorunome/Gamebuino/tree/tilemapper
Just simply remove the old library and replace it with the update.
Any way after updating the example compiles just haven't had a chance to look at it on the simbuino app yet.
https://github.com/Sorunome/Gamebuino/tree/tilemapper
Just simply remove the old library and replace it with the update.
Any way after updating the example compiles just haven't had a chance to look at it on the simbuino app yet.
Duhjoker Tue Aug 02, 2016 2:57 am
Awesome thank you gonna play with it now and create a new build.
Did you mean to comment out // the last line of the commands under void loop?
Ok starting at the first set of button commands i see you have added "player_direction = 1;". And then below at the player direction part you have "if (player_direction == 1) {..etc...
So in the buttons pressed code we are naming the player direction and assigning it an integer and the using that integer to tell where the sprite will face when button released in player direction?
Did you mean to comment out // the last line of the commands under void loop?
Ok starting at the first set of button commands i see you have added "player_direction = 1;". And then below at the player direction part you have "if (player_direction == 1) {..etc...
So in the buttons pressed code we are naming the player direction and assigning it an integer and the using that integer to tell where the sprite will face when button released in player direction?
Duhjoker Tue Aug 02, 2016 5:56 am
OK I put everything together and it compiles but I'm still getting flicker from the tilemap and sever speeds right or left to the boundary but up and down move correctly. I cant really tell if the player sprites are working correctly.
I went ahead and made a few terrain sprites extra for adding extra rooms and included them in the sketch. Not having to save all those huge bitmaps looks like it might be cheaper in the end which means more maps in a single program I say with fingers crossed
Edit: made a couple corrections player sprites stop with correct orientation but still zooms left and right and tilemap flickers. I can't figure out what I did to make it do that.
Edit 2: fixed my player sprites to 6,6, instead of 8,6. Don't know why I had them like that. Glitches still persist
I went ahead and made a few terrain sprites extra for adding extra rooms and included them in the sketch. Not having to save all those huge bitmaps looks like it might be cheaper in the end which means more maps in a single program I say with fingers crossed
- Code: Select all
#include <SPI.h>
#include <Gamebuino.h>
Gamebuino gb;

const byte tilemap[] PROGMEM = {14,8,
6,6,
3,3,3,3,3,3,6,6,3,3,3,3,3,3,
3,3,3,5,3,6,6,6,3,3,3,3,3,3,
3,3,6,6,6,6,6,6,6,3,3,3,3,3,
3,6,6,6,6,6,6,6,6,6,3,3,3,3,
6,6,6,6,6,6,6,6,6,6,6,6,6,6,
3,3,6,6,6,6,6,6,6,6,6,6,3,3,
3,3,6,6,6,6,6,6,6,6,6,6,3,3,
3,3,3,3,3,3,3,3,3,3,3,3,3,3};

const byte bush_bottom[] PROGMEM = {6,6,0x48,0x30,0x58,0x00,0x00,0x00,};
const byte bush_top[] PROGMEM = {6,6,0x00,0x00,0x00,0x30,0x48,0xb4,};
const byte bush[] PROGMEM = {6,6,0x30,0x48,0xb4,0x48,0x30,0x58,};
const byte rock_terrain[] PROGMEM = {6,6,0x48,0xa4,0x14,0xa0,0x84,0x50,};
const byte turtle_rock[] PROGMEM = {6,6,0x48,0xa4,0x14,0xa0,0x84,0x50,};
const byte port_noir[] PROGMEM = {6,6,0xfc,0xfc,0xfc,0xfc,0xfc,0xfc,};
const byte port_blanc[] PROGMEM = {6,6,0x00,0x00,0x00,0x00,0x00,0x00,};

const byte *spritesheet[] = {bush_bottom,bush_top,bush,rock_terrain,turtle_rock,port_noir,port_blanc};

const byte sever_front_1[] PROGMEM = {6,6,0x78,0x0,0x0,0x30,0x0,0xcc,};
const byte sever_front_2[] PROGMEM = {6,6,0x84,0x48,0x78,0x84,0x78,0x0,};
const byte sever_left_1[] PROGMEM = {6,6,0x78,0x80,0xc8,0xb4,0x0,0xcc,};
const byte sever_left_2[] PROGMEM = {6,6,0x4,0x58,0x30,0x0,0x78,0x0,};
const byte sever_rear_1[] PROGMEM = {6,6,0X78,0X78,0X0,0X30,0X0,0XCC,};
const byte sever_rear_2[] PROGMEM = {6,6,0x84,0x0,0x78,0x84,0x78,0x0,};
const byte sever_right_1[] PROGMEM = {6,6,0x78,0x4,0x4c,0xb4,0x0,0xcc,};
const byte sever_right_2[] PROGMEM = {6,6,0x80,0x68,0x30,0x0,0x78,0x0,};

  int player_x = 15;
  int player_y = 15;
  int player_direction = 0;

int x=0,y=0;


void setup() {
  gb.begin();
  gb.titleScreen(F("test"));
  gb.display.persistence = false;
}
void loop() {
  if(gb.update()){
    if (gb.buttons.repeat(BTN_RIGHT,1));
    if (gb.buttons.repeat(BTN_LEFT,1));
    if (gb.buttons.repeat(BTN_DOWN,1));
    if (gb.buttons.repeat(BTN_UP,1));
    gb.display.drawTilemap(x,y,tilemap,spritesheet); // draw the tilemap
//    gb.display.cursorY = 12; gb.display.println( x );gb.display.println( y );

 if(gb.buttons.repeat(BTN_UP,1)){
       gb.display.setColor(BLACK);{
    gb.display.drawBitmap(player_x,player_y,sever_rear_1);
    }
    gb.display.setColor(GRAY);{
    gb.display.drawBitmap(player_x,player_y,sever_rear_2);
    }
      player_direction = 1;
      player_y = player_y - 1;}
    if(player_y <= 0){
      player_y = 0;}


    if(gb.buttons.repeat(BTN_DOWN,1)){
      gb.display.setColor(BLACK);{
    gb.display.drawBitmap(player_x,player_y,sever_front_1);
    }
     gb.display.setColor(GRAY);{
    gb.display.drawBitmap(player_x,player_y,sever_front_2);
    }
      player_direction = 2;
      player_y = player_y + 1;}
    if(player_y >= 40){
      player_y = 40;}
  }


    if(gb.buttons.repeat(BTN_RIGHT,1)){
       gb.display.setColor(BLACK);{
    gb.display.drawBitmap(player_x,player_y,sever_right_1);
    }
     gb.display.setColor(GRAY);{
    gb.display.drawBitmap(player_x,player_y,sever_right_2);
    }
      player_direction = 3;
      player_x = player_x + 1;}
    if(player_x >= 77){
      player_x = 77;}


    if(gb.buttons.repeat(BTN_LEFT,1)){
       gb.display.setColor(BLACK);{
    gb.display.drawBitmap(player_x,player_y,sever_left_1);
    }
    gb.display.setColor(GRAY);{
    gb.display.drawBitmap(player_x,player_y,sever_left_2);
    }
      player_direction = 4;
      player_x = player_x - 1;}
    if(player_x <= -2){
      player_x = -2;}

      ////////////PLAYER DIRECTION/////////////

 if (player_direction == 1){
        gb.display.setColor(BLACK);{
        gb.display.drawBitmap(player_x,player_y,sever_rear_1);
      }
        gb.display.setColor(GRAY);{
        gb.display.drawBitmap(player_x,player_y,sever_rear_2);
        }
      }
      else if (player_direction == 2){
        gb.display.setColor(BLACK);{
        gb.display.drawBitmap(player_x,player_y,sever_front_1);
      }
        gb.display.setColor(GRAY);{
        gb.display.drawBitmap(player_x,player_y,sever_front_2);
        }
      }
else if (player_direction == 3){
        gb.display.setColor(BLACK);{
        gb.display.drawBitmap(player_x,player_y,sever_left_1);
      }
        gb.display.setColor(GRAY);{
        gb.display.drawBitmap(player_x,player_y,sever_left_2);
        }
      }
      else if (player_direction == 4){
        gb.display.setColor(BLACK);{
        gb.display.drawBitmap(player_x,player_y,sever_right_1);
      }
        gb.display.setColor(GRAY);{
        gb.display.drawBitmap(player_x,player_y,sever_right_2);
        }
      }
      else {
        gb.display.setColor(BLACK);{
        gb.display.drawBitmap(player_x,player_y,sever_front_1);
      }
        gb.display.setColor(GRAY);{
        gb.display.drawBitmap(player_x,player_y,sever_front_2);
        }
      }
 }
Edit: made a couple corrections player sprites stop with correct orientation but still zooms left and right and tilemap flickers. I can't figure out what I did to make it do that.
Edit 2: fixed my player sprites to 6,6, instead of 8,6. Don't know why I had them like that. Glitches still persist
Duhjoker Tue Aug 02, 2016 8:53 am
Ok I've staring at the screen and fixing things way too long but I think I know what the problem is.
On the player direction I need to add the
For each color of player Sprite color
My new rock terrain sprite sucks gonna go back to the old.
Edit::: Fixing the { } placement seems to have fixed my sketch though as far as moving the character and the tilemap flickering. It's too late to try the what I mentioned above but for some reason the white bitmap I made labeled port_blanc shows a 3 bit vertical line on each 6x6 square on the tile map
Neat trick I learned tonight, if you click on a { or } bracket it will mark its match on the sketch so you can tell which ones are open and which ones are closed.
On the player direction I need to add the
- Code: Select all
else if (player_direction == X){
   gb.display.setColor(XXXX); {
   gb.display.drawBitmap(player_x,player_y,SpriteID);
}
For each color of player Sprite color
My new rock terrain sprite sucks gonna go back to the old.
Edit::: Fixing the { } placement seems to have fixed my sketch though as far as moving the character and the tilemap flickering. It's too late to try the what I mentioned above but for some reason the white bitmap I made labeled port_blanc shows a 3 bit vertical line on each 6x6 square on the tile map
Neat trick I learned tonight, if you click on a { or } bracket it will mark its match on the sketch so you can tell which ones are open and which ones are closed.
naed Tue Aug 02, 2016 1:42 pm
Sound like you've found your problem with the player sprite, that's because my example only included a one color black sprite, you would need to add a second command to show the grey pixels for your sprite, I look forward to hearing if this fix works
I've been looking at the collision detection for you, there is some info on this forum, but if I'm honest right now it's a little above my knowledge base
I've been looking at the collision detection for you, there is some info on this forum, but if I'm honest right now it's a little above my knowledge base
Duhjoker Tue Aug 02, 2016 11:16 pm
All right guys I think it's time to start a new thread. IDK about the rest of you but I think I finally understand how to display sprites and game maps. Should be enough info here get the most learningly challenged coder (I speak of myself) up and running.
A special thanks to Naed and Sorunome for your patience and time. I hope to be able to give back to the community myself.
Next guide:::: Newbs need help with collision detection.
At some point I will clean this thread up so most of my gobbledygook is gone Leaving only relevant information to make it easier to find what you are looking for. :P
A special thanks to Naed and Sorunome for your patience and time. I hope to be able to give back to the community myself.
Next guide:::: Newbs need help with collision detection.
At some point I will clean this thread up so most of my gobbledygook is gone Leaving only relevant information to make it easier to find what you are looking for. :P
Duhjoker Wed Aug 03, 2016 2:19 am
ok I having trouble with tilemapping. I got the flickering to stop but now it looks like its showing negative ? I don't really know but its also creating an extra set of three vertical pixels on the blank sprites.
- Code: Select all
#include <SPI.h>
#include <Gamebuino.h>
Gamebuino gb;

const byte tilemap[] PROGMEM = {14,8,
6,6,
3,3,3,3,3,3,6,6,3,3,3,3,3,3,
3,3,3,5,3,6,6,6,3,3,3,3,3,3,
3,3,6,6,6,6,6,6,6,3,3,3,3,3,
3,6,6,6,6,6,6,6,6,6,3,3,3,3,
6,6,6,6,6,6,6,6,6,6,6,6,6,6,
3,3,6,6,6,6,6,6,6,6,6,6,3,3,
3,3,6,6,6,6,6,6,6,6,6,6,3,3,
3,3,3,3,3,3,3,3,3,3,3,3,3,3};

const byte bush_bottom[] PROGMEM = {6,6,0x48,0x30,0x58,0x00,0x00,0x00,};
const byte bush_top[] PROGMEM = {6,6,0x00,0x00,0x00,0x30,0x48,0xb4,};
const byte bush[] PROGMEM = {6,6,0x30,0x48,0xb4,0x48,0x30,0x58,};
const byte rock_terrain[] PROGMEM = {6,6,0x58,0xa4,0x14,0xa0,0x84,0x58,};
const byte turtle_rock[] PROGMEM = {6,6,0x48,0xa4,0x14,0xa0,0x84,0x50,};
const byte port_noir[] PROGMEM = {6,6,0xfc,0xfc,0xfc,0xfc,0xfc,0xfc,};
const byte port_blanc[] PROGMEM = {6,6,0x00,0x00,0x00,0x00,0x00,0x00,};

const byte *spritesheet[] = {bush_bottom,bush_top,bush,rock_terrain,turtle_rock,port_noir,port_blanc};

const byte sever_front_1[] PROGMEM = {6,6,0x78,0x0,0x0,0x30,0x0,0xcc,};
const byte sever_front_2[] PROGMEM = {6,6,0x84,0x48,0x78,0x84,0x78,0x0,};
const byte sever_left_1[] PROGMEM = {6,6,0x78,0x80,0xc8,0xb4,0x0,0xcc,};
const byte sever_left_2[] PROGMEM = {6,6,0x4,0x58,0x30,0x0,0x78,0x0,};
const byte sever_rear_1[] PROGMEM = {6,6,0X78,0X78,0X0,0X30,0X0,0XCC,};
const byte sever_rear_2[] PROGMEM = {6,6,0x84,0x0,0x78,0x84,0x78,0x0,};
const byte sever_right_1[] PROGMEM = {6,6,0x78,0x4,0x4c,0xb4,0x0,0xcc,};
const byte sever_right_2[] PROGMEM = {6,6,0x80,0x68,0x30,0x0,0x78,0x0,};

  int player_x = 15;
  int player_y = 15;
  int player_direction = 0;

int x=0,y=0;


void setup() {
  gb.begin();
  gb.titleScreen(F("test"));
  gb.display.persistence = false;
}


void loop() {
  if(gb.update()){
    if (gb.buttons.repeat(BTN_RIGHT,1));
    if (gb.buttons.repeat(BTN_LEFT,1));
    if (gb.buttons.repeat(BTN_DOWN,1));
    if (gb.buttons.repeat(BTN_UP,1));
    gb.display.drawTilemap(x,y,tilemap,spritesheet); // draw the tilemap
//    gb.display.cursorY = 12; gb.display.println( x );gb.display.println( y );


 if(gb.buttons.repeat(BTN_UP,1)){
       gb.display.setColor(BLACK);{
    gb.display.drawBitmap(player_x,player_y,sever_rear_1);
       }
    gb.display.setColor(GRAY);{
    gb.display.drawBitmap(player_x,player_y,sever_rear_2);
    }
      player_direction = 1;
      player_y = player_y - 1;}
    if(player_y <= 0){
      player_y = 0;}


    if(gb.buttons.repeat(BTN_DOWN,1)){
      gb.display.setColor(BLACK);{
    gb.display.drawBitmap(player_x,player_y,sever_front_1);
    }
     gb.display.setColor(GRAY);{
    gb.display.drawBitmap(player_x,player_y,sever_front_2);
    }
      player_direction = 2;
      player_y = player_y + 1;}
    if(player_y >= 40){
      player_y = 40;}


    if(gb.buttons.repeat(BTN_RIGHT,1)){
       gb.display.setColor(BLACK);{
    gb.display.drawBitmap(player_x,player_y,sever_right_1);
    }
     gb.display.setColor(GRAY);{
    gb.display.drawBitmap(player_x,player_y,sever_right_2);
    }
      player_direction = 3;
      player_x = player_x + 1;}
    if(player_x >= 77){
      player_x = 77;}


    if(gb.buttons.repeat(BTN_LEFT,1)){
       gb.display.setColor(BLACK);{
    gb.display.drawBitmap(player_x,player_y,sever_left_1);
    }
    gb.display.setColor(GRAY);{
    gb.display.drawBitmap(player_x,player_y,sever_left_2);
    }
      player_direction = 4;
      player_x = player_x - 1;}
    if(player_x <= -2){
      player_x = -2;}

      ////////////PLAYER DIRECTION/////////////

 if (player_direction == 1){
        gb.display.setColor(BLACK);{
        gb.display.drawBitmap(player_x,player_y,sever_rear_1);
      }
        gb.display.setColor(GRAY);{
        gb.display.drawBitmap(player_x,player_y,sever_rear_2);
        }
 }

      else if (player_direction == 2){
        gb.display.setColor(BLACK);{
        gb.display.drawBitmap(player_x,player_y,sever_front_1);
      }
        gb.display.setColor(GRAY);{
        gb.display.drawBitmap(player_x,player_y,sever_front_2);
        }
      }
else if (player_direction == 3){
        gb.display.setColor(BLACK);{
        gb.display.drawBitmap(player_x,player_y,sever_left_1);
      }
        gb.display.setColor(GRAY);{
        gb.display.drawBitmap(player_x,player_y,sever_left_2);
        }
}
      else if (player_direction == 4){
        gb.display.setColor(BLACK);{
        gb.display.drawBitmap(player_x,player_y,sever_right_1);
      }
        gb.display.setColor(GRAY);{
        gb.display.drawBitmap(player_x,player_y,sever_right_2);
        }
      }
      else {  gb.display.setColor(BLACK);{
        gb.display.drawBitmap(player_x,player_y,sever_front_1);
      }
        gb.display.setColor(GRAY);{
        gb.display.drawBitmap(player_x,player_y,sever_front_2);
        }
      }
  }

}
Duhjoker Wed Aug 03, 2016 2:40 am
fixed::: switched to binary on terrain sprites working now!!!!
Duhjoker Fri Nov 18, 2016 12:20 am
Ok so what if I want to do world map more a kind to legend of Zelda a link to the past, can I make my PC sprites go behind tiles? Where it disappears and the reappears out the other end?
Duhjoker Sat Jun 03, 2017 7:45 am
I'm working on playing with button controls and I have a question. What do these numbers represent .....
In this function to move a sprite.......
I cant find it in the old posts. But they are included in all the new posts as seen in a sketch above this post.
- Code: Select all
if(player_y <= 40){
              player_y = 40;}
In this function to move a sprite.......
- Code: Select all
       if (tft.buttons.repeat(BTN_DOWN,1)){
        tft.drawBitmap1(player_x, player_y,paul_front_black,16,16,BLACK);
         tft.drawBitmap1(player_x, player_y,paul_front_blue,16,16,BLUE);
          tft.drawBitmap1(player_x, player_y,paul_front_brown,16,16,BROWN);
           tft.drawBitmap1(player_x, player_y,paul_front_pink,16,16,PINK);
            tft.drawBitmap1(player_x, player_y,paul_front_yellow,16,16,YELLOW);

            player_direction = 2;
             player_y = player_y + 1;}
            if(player_y <= 40){
              player_y = 40;}
I cant find it in the old posts. But they are included in all the new posts as seen in a sketch above this post.
awesome101 Sat Jun 03, 2017 5:52 pm
It's to prevent Paul from vertically crossing past the fortieth pixels on the top of the screen. It's like a border he can't cross